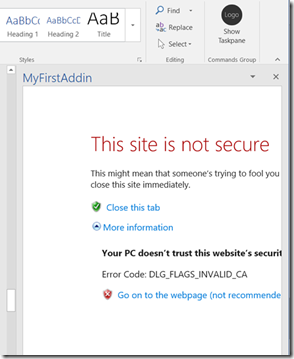
Yesterday we’ve seen an issue installing a Word Add-in when the certificate used in the Add-in is not (yet) trusted:
To solve this, we need to add the server certificate as a trusted authority to the certificate store. In my post Office Development – Fixing Certificate Issue with OpenSSL Certificate I already showed you how to create the certificate. I even announced that I had to add the certificate to the trusted root certificates but, in the end, never did that – resulting in the issue above.
Clean up the installed Add-in
First, let’s clean up the installed Add-in to re-do the installation later on to see if it installs correctly after adding the certificate to the trusted root certificates.
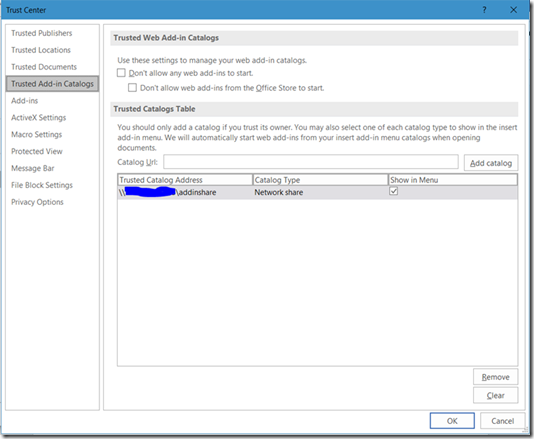
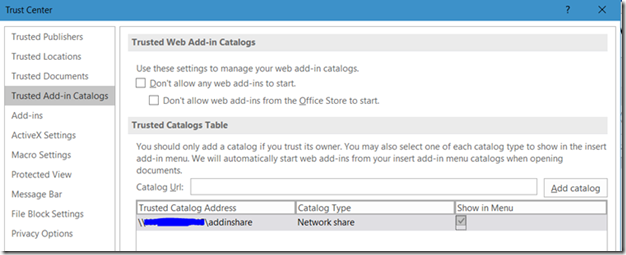
Go back to the File/Options/Trust Center/Trust Center Settings … button and click it
Select the Trusted Catalog Address, click Remove and click OK to close the dialog. You’ll get a message that it will be effective when you close and open Word again.
Close Word to get it done.
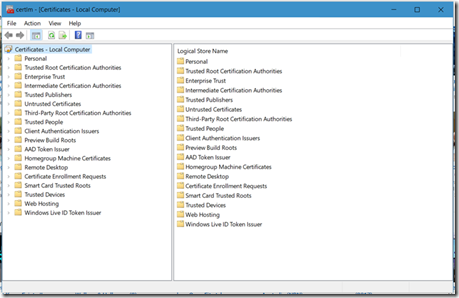
Now start the certificate manager:
C:\Windows\System32\certmgr.msc
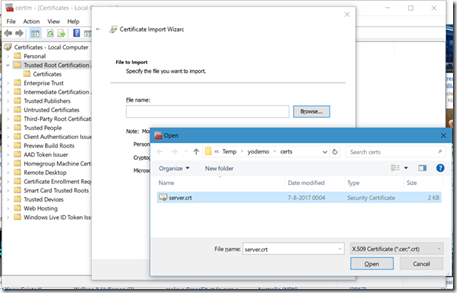
Select the Trusted Root Certification Authorities node, right click, All Tasks, Import …
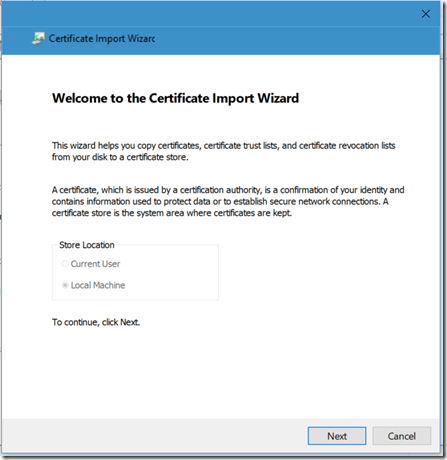
Click Next to continue
Select the server certificate from the Add-in folder that you created while generating the certificate. Click Open and add the certificate.
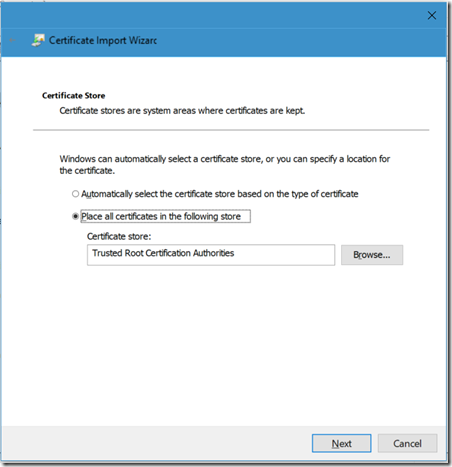
Click Next
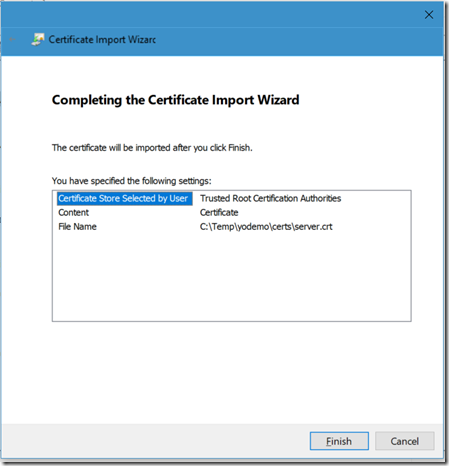
And … Finish to complete the certificate installation.
Install the Word Add-in again
Repeating the steps from the previous post, go to File/Options/Trust Center/Trust Center Settings … button and click it.
Add the network share again, don’t forget to check the checkbox. Close the dialogs and if you get this message below, close Word and start it again.
Now go to the Insert Tab and click My Add-ins.
Repeating the sequence that we did in our previous post, go to the Insert tab and click My Add-ins.
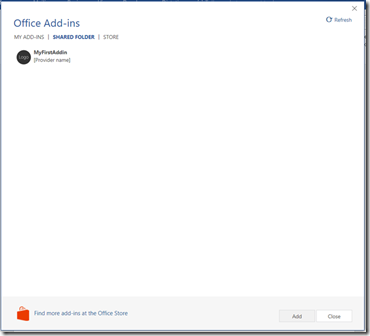
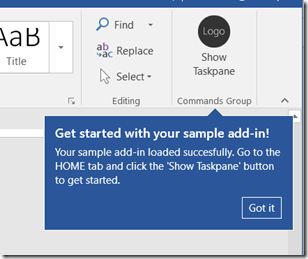
From the SHARED FOLDER tab select your Add-in again and click Add. Immediately you see the button at the Home Tab in the Commands Group.
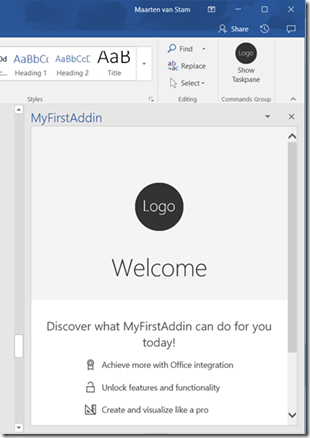
And if you now click the button, the Add-in is now loaded without issues. No more warnings for security issues or incorrectly named certificates. It just runs.
So, what have we learned today
– Make sure your security is in place. Prepare your certificates with the correct names on the certificate and add it to the trusted root certificates.
(Note: most of these issues are originated by creating self signed certificates. When using commercially generated certificates most of these certificates already come from trusted root certificates)
– Cleaning (removing) installed Add-ins is not so trivial as you might expect. We had to remove the Catalog entry, closing Office and reopen Office clears the Add-in. It would be easier if the user interface provided an option to remove the Add-in in an easier manner.
(Note: removing the Add-in from Word Online is even worse. I asked the question on StackOverflow where it was confirmed that there is no easy remove option)
Recap
So far, we installed NodeJS, Git, Yeoman and created a simple Add-in. Next, we tried to install it on Word Online, fixed some security issues, installed it on the Word local client, fixed some more security issues and finally installed it on the local Word client again, this time without issues.
Not much interaction yet between the Add-in and Word but we’ll look at that later.
To be continued …





0 Replies to “Office Development – Fixing Trusted Authority – Word Client”