Office Development–Running Word Add-in on your local Word client

clip_image002

In my last post Office Development – Running Word Online Add-in I explained how to install your Add-in to use in Word Online. Today we will bring the same Add-in into your local Word client installation, Word 2016:

clip_image004

To do so you first need to start your ‘web server’ again by calling

npm start

from the root of your Add-in folder.

Now you have your ‘web server’ up and running and we need to make this visible for Word. Word is able to ‘see’ Add-ins that are exposed by manifest files in a shared network location or web URL. Today we will use the shared network location to expose the manifest file.

To create a shared network location, you simply create a dedicated folder on your machine:

clip_image006

In this case I just created an extra folder in the Add-in project called addinshare.

Don’t forget to copy the manifest file “my-first-addin-manifest.xml” to the just created folder!

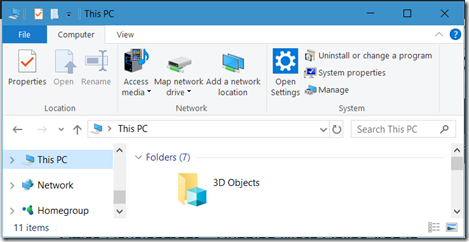
Now create the network share by opening the Explorer. Go to “This PC” and select from the menu/ribbon “Manage”

clip_image008

This will open the Computer Management tool. Browse in the left tree to Computer Management\System Tools\Shared Folders\Shares, select it:

clip_image010

Select Action, New Share:

clip_image012

Go to the folder that you dedicated for your Add-in

clip_image014

clip_image016

Click Next to continue

clip_image018

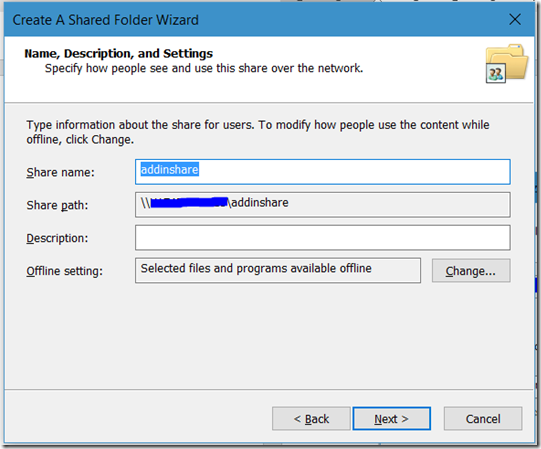
If you like change the name of the share, and click Next

clip_image020

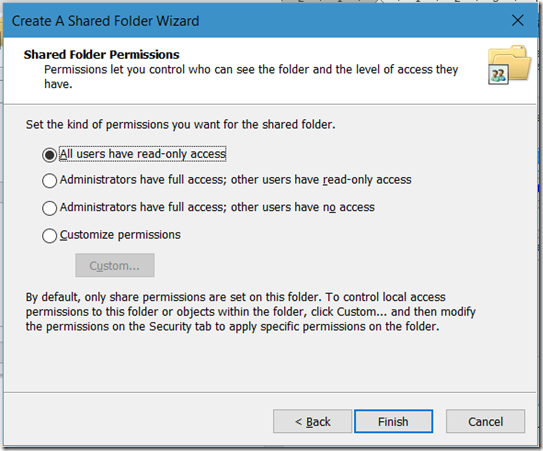
For now, add All Users have read-only access (you might want to change the access rights later on but for demo purposes pick the default) and click Finish.

clip_image022

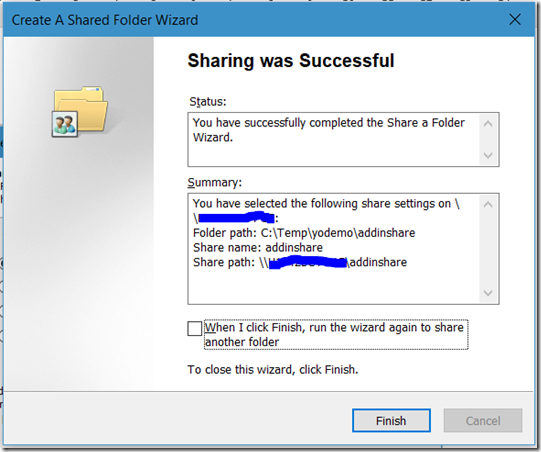
Click Finish again to close the dialog and close the Management Tool.

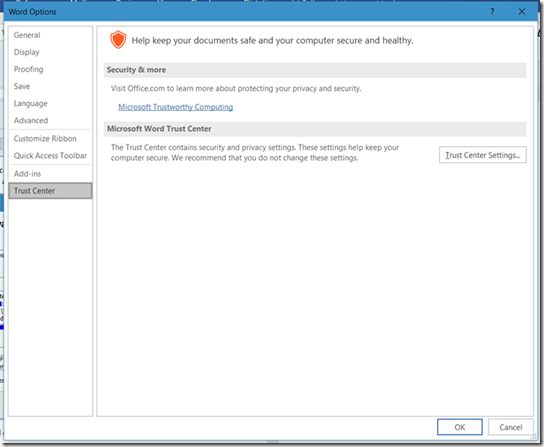
Now back to Word, goto the Trust Center under File, Options, Tab Trust Center, Button “Trust Center Settings …”

clip_image024

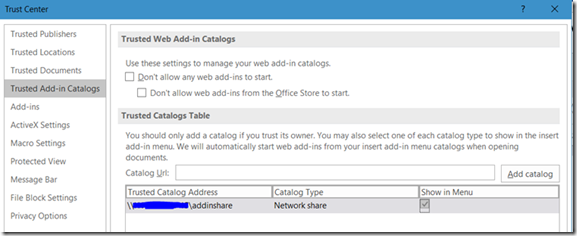
On the left side select “Trusted Add-in Catalog” and in the Catalog URL enter the network share from your computer \\<computername>\<sharename> that you just created in the previous steps. Click Add catalog to push it in the list.

When added to the list, check the checkbox Show in Menu to make it available in Word.

Note: Before clicking “Add catalog” it would be a good thing to check in Explorer that your folder spelling of the shared folder is correct and is opened without issues.

clip_image026

Click OK twice to close the dialogs. You may see this as well:

clip_image028

If all went right you should be able to add your Add-in to Word. Close all instances of Word and restart Word.

Go to the Insert Tab, just like you did in Word Online from the previous post and click My Add-ins:

clip_image030

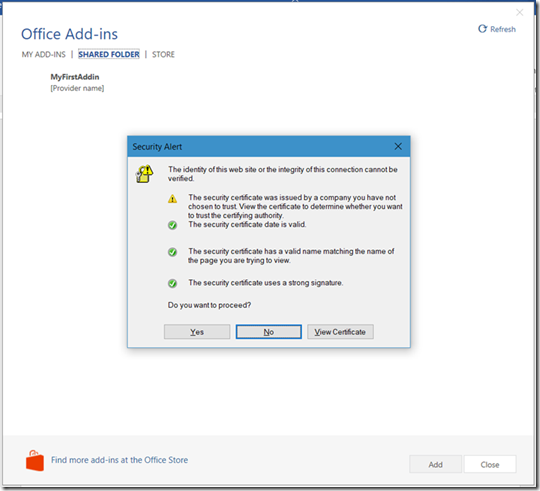
Clicking the My Add-ins button in the ribbon will give you the dialog below if you select the option SHARED FOLDER (notice that Word recognized the share and provided you with this menu option. If the share wasn’t recognized the option for SHARED FOLDER would not appear).

clip_image032

What is up? Didn’t we fix the certificate issue? We had it running in the browser, didn’t we?

Well, yes … but what I forgot was to add the certificate to the list of trusted authorities. For now we can go on, we know it is safe but we need to fix this later on (food for another blogpost ).

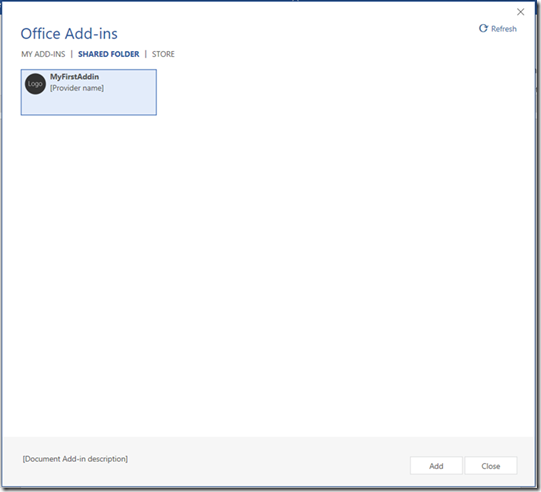
Click Yes to confirm, select the MyFirstAddin an click Add.

clip_image034

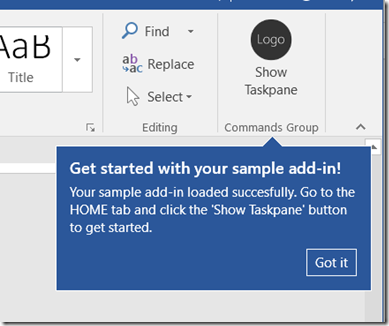
After closing the dialog by clicking Add a new Ribbon item is added to your Word Home Tab:

clip_image036

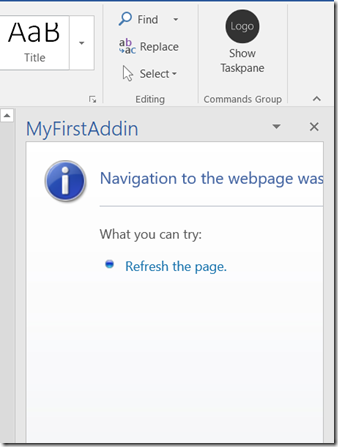
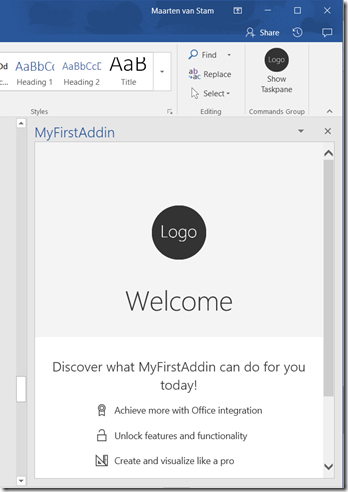
Kinda useless information, you are already on the HOME tab … nevertheless, click the “Show Taskpane” button to get started. For me this resulted in:

clip_image038

Sh*t happens so I refreshed the page, to see what happened:

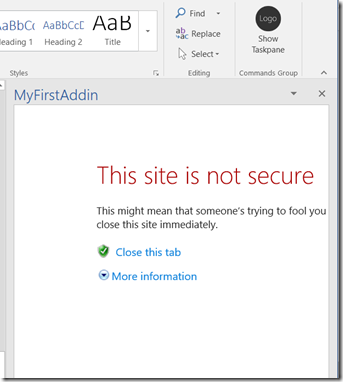
clip_image040

A bit better, but still not right. This time we recognized the “not secure” warning. My own fault, it still needs the trusted authority fix. For now, click More information:

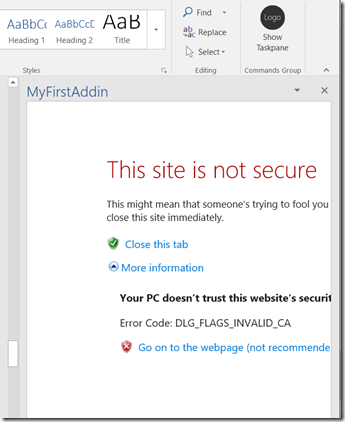
clip_image042

This opens up the option to Go on to the webpage (not recommended). We know it is ok in this case, if the source was unknown you should just back out and close the add-in. In this case we created it, know it is secure so we go on to the website, although it was not recommended. We like to be a little bit stubborn at times and there you have it, it worked:

clip_image044

Quite a journey again, still not flawless but cause by my own doing. We now have the Add-in running in both Word Online and in Word 2016 on your local machine.

In our next step, I’ll add the certificate to the trusted authorities to redo this without issues, hopefully…

To be continued

Office Development – Running Word Online Add-in

Office Development - Running Add-in

What we’ve seen so far is that we installed NodeJS, Git, Yeoman and fixed a security issue. All if this to create a basic ‘hello world’ Add-in. I must be honest and admit that running your first VBA add-in was a lot easier and running out of the box with just a few lines of code.

But let’s go on. We did run the Add-in as a website, but not as a real Add-in in the Word client. The instructions explain that the easiest thing to do would be to use Word Online. So here we go:

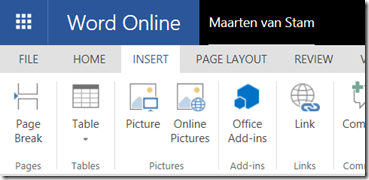
Open Word Online, go to the Insert Tab

clip_image002

Click the Office Add-ins button

clip_image004

On the top right select “Manage My Add-ins” to upload the Add-in manifest

clip_image006

Click Browse to find the Add-in manifest file

clip_image008

After uploading the manifest, you should see the Show Taskpane button appear in the Commands Group and if you click the button the Task pane appears showing you exactly what you’ve seen in our earlier blogpost:

clip_image010

And there you have it … your first Add-in running in the Word client. Congratulations.

I do have to admit that it didn’t work immediately … I had to upload the manifest more than once to get it to work. At first my icon didn’t appear, the group did but the Task pane didn’t load either after clicking the ‘no icon’-button. Trying again solved it (no clue to why the first attempt failed).

Obviously, the scenario we’ve seen so far won’t work ‘in production’. The Add-in website is currently still running on your local machine at a specific port (3000 in this case) and adding the Add-in using Word Online is not directly the most optimal way to get your Add-in up and running.

Our journey of research is apparently not ready yet. We need to overcome the ‘demo’ instructions and see if we can get it closer to a production ready system. I think my next step would be to find out how to run the Add-in in the Word client running on the desktop. Maybe the next step after that to run it on a Mac.

This all is still just running the Add-in, we haven’t seen any interaction with the documents. No fear, we will get there … I’m sure so keep with me and hang in here.

To be continued …
Office Development – Fixing Certificate Issue with OpenSSL Certificate

clip_image002

Yesterday we’ve developed our first Add-in for Word, that is – the web ‘site’ that represents the Add-in. We did however run into an issue where the certificate for the website wasn’t recognized due to the different naming on the certificate. Also, the certificate wasn’t trusted so even if we had a correct named certificate we needed to add it to the trusted root certificates.

Let’s fix the naming issue first. To do so we need to create a new certificate with the right name on it. There are a couple of options to do this. For now, I will be using OpenSSL to create this new certificate.

To do so you’ll need to install some tooling to support OpenSSL on your Windows machine. You can download it here:

https://slproweb.com/products/Win32OpenSSL.html

From the downloads, I installed the Win64 OpenSSL v1.1.0f version. By the time you read this it may have been updated to a newer version. Just check the list of downloads to see what the current version is.

Installing Win64 OpenSSL v1.1.0f

clip_image004

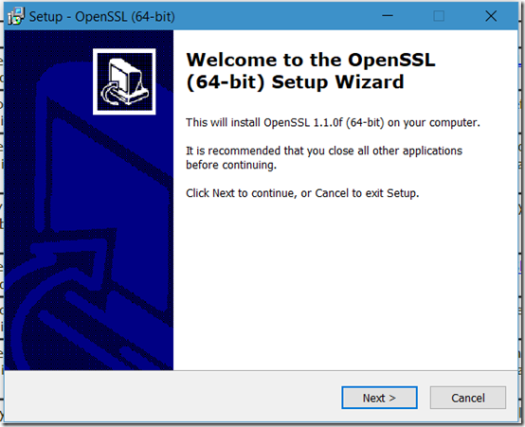
Installing is fairly trivial, just follow the instructions, click Next

clip_image006

Accept the agreement (or don’t but you won’t get the software then ) and click Next again.

clip_image008

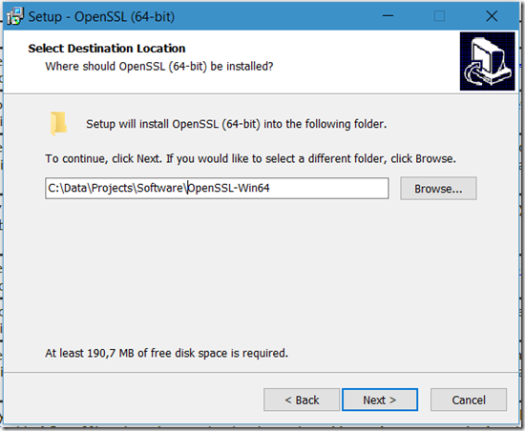
Select the path where you want to install the software. Initially it opts to install it in the root of the C:\ drive, but I prefer not to put it in the root of my drive so I’ve changed this to put it in my data folder. Click Next.

clip_image010

Accept the default and click Next.

clip_image012

Again, I prefer not to install directly into my system directory so I changed the default to “The OpenSSL binaries (/bin) directory. Click Next.

clip_image014

Click Install to install the software

clip_image016

Optionally you are asked to support the Windows OpenSSL software by donating an amount of money. Feel free to what you think it is worth and click Finish.

Now you can find the installed software in the location specified in step 3 of the installation process.

To create the certificate in your Word Add-in projects you need to create a subfolder in the root of your Add-in project:

Create a .\certs folder in the project

Copy openssl.cnf from (in my case) C:\Data\Projects\Software\OpenSSL-Win64\bin\cnf into the certs folder you just created in the previous step

Open the .\certs\openssl.cnf file and add the following to the end of the file:

[ SAN ]

subjectAltName=DNS:localhost

Open a command window and run the command from the .\certs folder:

C:\Data\Projects\Software\OpenSSL-Win64\bin\openssl genrsa -des3 -out server.key 2048

This will generate the private key. In this process, you need to enter a password twice:

clip_image018

Next you will be generating the certificate request:

C:\Data\Projects\Software\OpenSSL-Win64\bin\openssl req -new -sha256 -key server.key -out server.csr -subj /CN=localhost -reqexts SAN -config openssl.cnf

You will need to enter the previously inserted password again here.

clip_image020

Now generate the certificate based on the request

C:\Data\Projects\Software\OpenSSL-Win64\bin\openssl x509 -req -days 3650 -in server.csr -signkey server.key -out server.crt -extensions SAN -extfile openssl.cnf

clip_image022

Again, enter pass phrase …

Now copy the password protected server key:

copy server.key server.key.copy

Create an unprotected private key:

C:\Data\Projects\Software\OpenSSL-Win64\bin\openssl rsa -in server.key.copy -out server.key

At this time you’ll have an RSA key with the necessary subject and subjectAltName. Let’s put this into our project by changing the bsconfig.json file in the root of the project.

Replace the line "https": true, with the following:

"https": {

"key": "./certs/server.key",

"cert": "./certs/server.crt"

},

Like this:

clip_image024

Don’t forget to save the bsconfig.json file before running npm start as I did, otherwise it still won’t like your certificate as it will point to the old one .

npm start

If all goes well we’ve now fixed the certificate error due to the different naming and our website will run fine (on your local machine on port 3000):

clip_image026

Now we fixed the website we are now ready to run it as a Word Add-in in a Word client. We will go over the steps to do this in my next blogpost.

To be continued
Office Development – Installing and Running Yeoman

Office Development - Yeoman

In the previous two posts around creating your first Word add-in we installed Node JS in the first post Office Development – Installing Node.js and installed Git in the second post Office Development – Installing Git. If you haven’t done this already move along and do that first.

In this post, third in the series of building your first Word Add-in (based on the JavaScript API for Office) we will install and use another tool called Yeoman.

Yeoman

Yeoman used to be a member of the social class in late medieval to early modern England (source wiki: https://en.wikipedia.org/wiki/Yeoman) but these days it is the name for an open source scaffolding tool, released at Google I/O 2012. Yeoman runs as a command-line tool and will provide you with a boiler plate project for several different solutions. Because the software is open sourced you can find it on GitHub: https://github.com/yeoman

Over time there have been created many generators for Yeoman to do all sorts of things such as creating website starters and more. The reason why we discuss it here is because they (the Office Dev Team) also created a generator that allows you to quickly build a Microsoft Office Add-in project using the Yeoman scaffolding tool.

You can use this if you simply want to start creating an add-in with a basic text editor other than Visual Studio. Of course, you can also use more advanced text editors including Visual Studio of Visual Studio Code but just to show you that you don’t need much to create your first add-in you can use this option.

Installation is easy (provided you installed the tools from the other two blogposts):

Open a Command window (Windows Flag, Command) and run:

npm install -g yo generator-office

This will globally (-g) install the Yeoman (yo) package and the Office Generator (generator-office) on your machine. The routine ends in an automatically engaged final check by yodoctor:

clip_image002

You can also check it yourself by running the command:

npm list -g -depth=0

clip_image004

If all went well you should see, as you can see in the picture above, at least yo@<version> and generator-office@<version>.

Now will be the time to generate our first Word Add-in … hooray!

Enter the command line command:

yo office

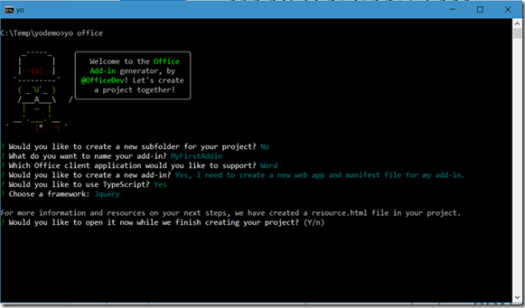
This will kick off a series of questions needed to create your add-in based on your input:

clip_image006

Except for the name I opted to keep the defaults. You can select other than the defaults but for now keeping the defaults is ok.

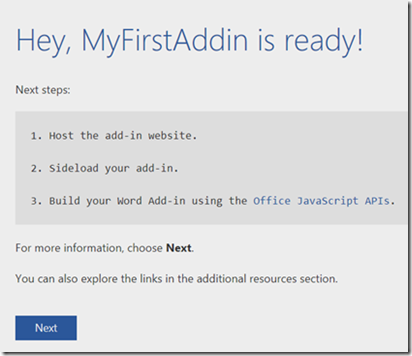
Yeoman starts generating the add-in for you and in the meantime a website is opened with instructions. The instructions take you by the hand and will guide you through the process when the add-in finished generating.

clip_image008

At this time generating your add-in is probably finished, so follow the instructions from the webpage by clicking Next

According to this page the next command should be:

npm start

This will start the local server hosting the add-in at:

https://localhost:3000

As you can see it will be hosted at a ‘secure’ site (https) on port 3000. This ‘secure’ site could give you some headache however. Initially the site needs the firewall to be opened:

clip_image010

I’d recommend unchecking the Public Networks checkbox and only to allow it on your Private Networks for now.

Continuing the process will result in another security issue:

clip_image012

Another no-go? Well, maybe … but let’s click “Details” first and find out what this is all about. So far not a real smooth experience for the novice office add-in developer don’t you think? Go ahead, click “Details”:

clip_image014

Ah! What it says is that your PC doesn’t trust the website’s security certificate … and to be more specific it found that the name of the hostname on the security certificate is different than the one you are trying to visit.

This is quite logical because you are visiting your localhost and the website’s security certificate, as you will find out a bit later, is signed to by “Internet Widgits Pty Ltd” so against all recommendations continue and click the “Go on to the webpage” link.

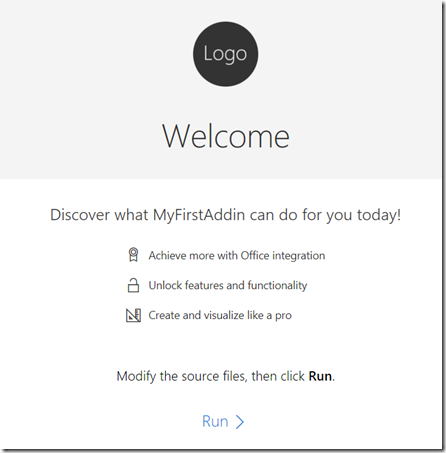
clip_image016

And there you have it! Your first Word Add-in!

“Well, hel-lo … there is no Word here, what do you mean” you might say … and you are right (again).

Although I explained in my earlier blogposts that Add-ins built by using the JavaScript for Office APIs basically are websites hosted in the Office client such as Word you’ve seen here that your really are building a website.

The security issues will however throw a big issue loading this website in the Word client. It will simply be rejected as it appeared to be unsafe to run.

Solving the certificate issue is a story on itself so I will put this in a separate blogpost.

What you’ve seen so far is that you built your new add-in by simply using some web development tools. No Visual Studio installations, nothing of this all. Obviously, you can use Visual Studio to create Office Add-ins, and I will show you that in another series of blogposts. For now we still need to finalize our first journey of creating this Word Add-in but we need to overcome our security issues first.

And therefor, to be continued …

Office Development – Installing Git

Office Development - Git

In our previous step to build our first Word Add-in with JavaScript for Office we installed Nodejs. Today we continue with installing Git. Over time there will not be a need to install these tools again, by then you will be a professional web developer living in the world of these tools and probably have these installed already before jumping into another project.

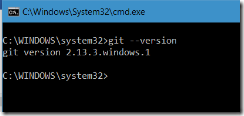
For now I assume you didn’t have the tools installed, but you can check on the command line with the command:

git –version

If you already installed Git you probably see something like this:

clip_image002

You can find the Git installer just by GoogleBinging for “Git” and this will lead you to:

https://git-scm.com

Now, on the right you see a nice downloader button that selects your installer based on the machine that you are on. Click this, and hit Run (usually you wouldn’t be so dumb and save the downloader first on your machine in order to have the anti-virus checker check your download but for now we just let it run #yolo … )

clip_image004

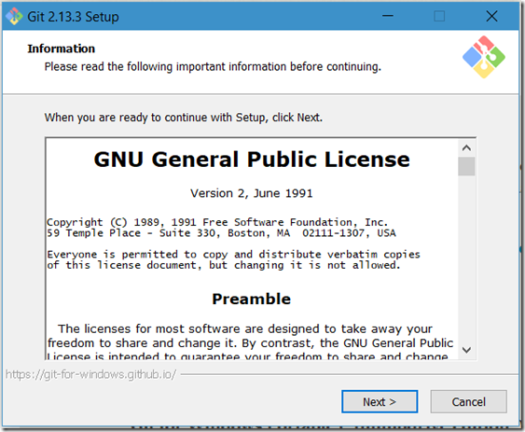
As usual the first dialog you’ll see are the GNU License terms, your only option is to agree by clicking next or abandon the installer and start reading a good book and continue living your life without the software. Today we’ll decide to go on however …

clip_image006

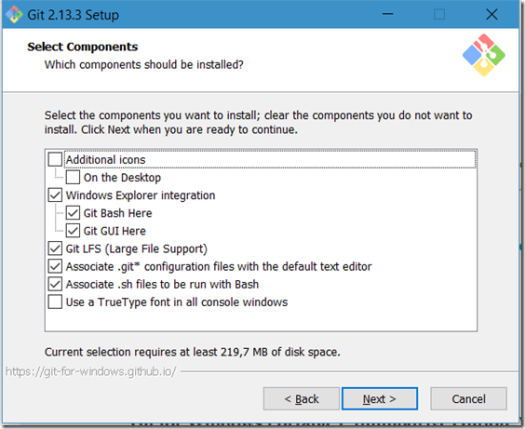
Now select a few components. You can add some icons to the desktop and I opt for the settings to add Windows Explorer Integration and the other defaults.

clip_image008

I also have it install the icons on the desktop for quick access, you can always throw ‘em in the bin if you think they are in your way.

clip_image010

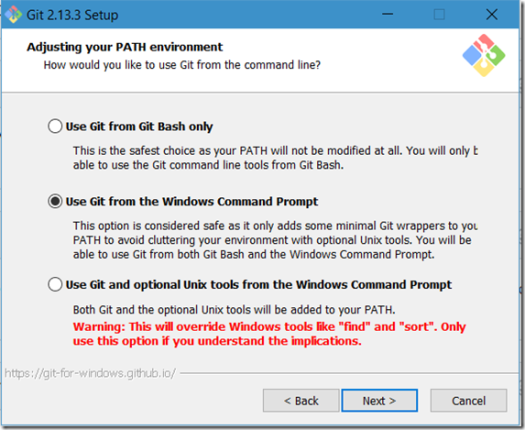
The next dialog above is for adjusting the PATH environment. My option is to “Use Git from the Windows Command Prompt”. Note that with this option you’ll be able to use both Git Bash

Bash what? …

Ok, ok, I know, if you are native from Windows you probably won’t even know what Bash is. For now, you don’t need to know other than that this is some sort of a Linux command line option.

Don’t worry, you get the hang of it once you are moved over to the ‘other side’.

clip_image012

Choosing the HTTPS transport backend I opted to “Use the native Windows Secure Channel library” (just because we are still in the mood of Windows, you can change this later if you like).

clip_image014

Configuring the line ends I leave the default as it was the recommended setting on Windows “Checkout Windows-style, commit Unix-style line endings”

You already noticed it, there is a lot of Unix influencing here … Bash, LineFeeds … it takes me back to the time I studied Computer Science. #throwbackwednesday

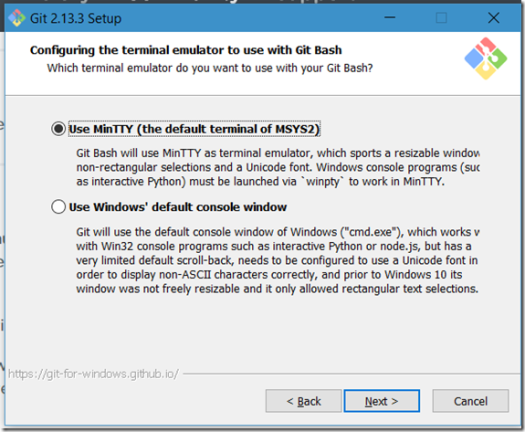
The next dialog is no different. Configure the terminal emulator to use with Git Bash

clip_image016

The option selected allows you to use both MinTTY as terminal emulator as the common Windows Console (“cmd.exe”).

clip_image018

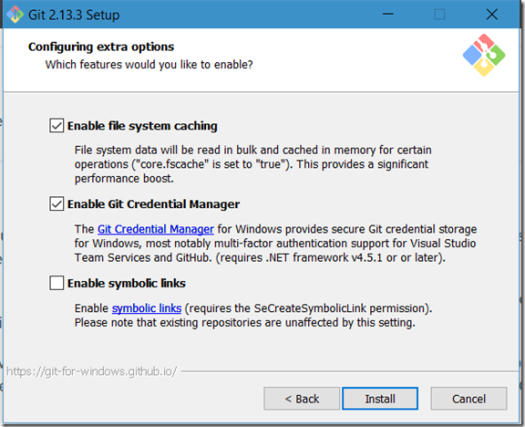
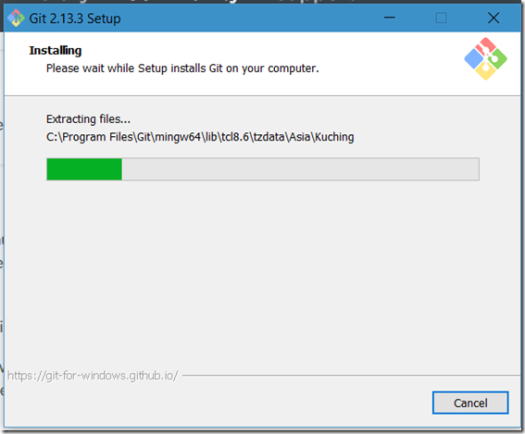
Again, select the defaults to enable file system caching and enabling the Git Credential manager. Hitting Install will kick off the Git Installer to install all the selected options you entered on the dialogs above:

clip_image020

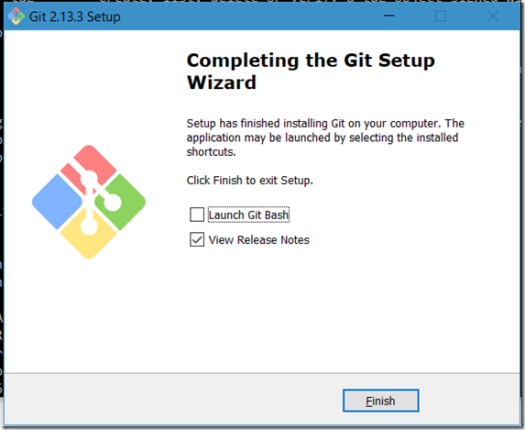
clip_image022

Done, if you want to have a quick view at what Bash is tick the option to Launch Git Bash. Otherwise it will just lead you to the Release Notes (if you didn’t remove the check before “View Release Notes” that is). You now have Git on your machine, check the version again by running git –version again.

You should see this (or a newer version if you read this later than the day of the blogpost):

clip_image002[1]

Ready to go into the next step to install Yeoman.

Yeoman whaaaaaaaaaaaaaat?

Yes, Yeoman … more in my next blog post.

Hang in there and see you tomorrow! You get used to it … let it all get into your system, GoogleBing it a bit for some extra context, perform all the steps from above doing it yourself and be ready for the next step.

Office Development – Installing Node.js

Office Development - NodeJs

It’s time to try to build our first Word Add-in using the JavaScript for Office APIs. We won’t look at the specifics but we will just start building and see where we’ll end.

I will go into detail a lot because this is what you often won’t see in the tutorials. By going into the small detailed steps, I hope you (and I for myself) won’t get lost. Also, I think it is just good to document it in detail so if you want to look back later all steps are easy to recover. The risk is of course that by then everything changed .

For this first Word Add-in, we will be using Yeoman and not to make things too complicated we start with Windows, the platform most existing Office developers come from. Yeoman is a Web Scaffolding Tool for Modern Webapps. That’s right webapps … welcome to the world of Web Developers. A world of weird named tools such as Grunt or Gulp and nothing like the .NET world.

With Yeoman, you can generate a project from scratch that inserts all you need to start quickly. To install Yeoman, you need to install Node.js and Git. For Node.js we go to nodejs.org and on the start page of this site you see the downloads:

clip_image002

What you see is two options: LTS (Long Term Support) and Current. The LTS version is the most stable version and this is the version that they committed to support for the long term. With the Current version, you are on your own. For now, it is ok to install the LTS release.

To check if you already have installed Node open a command window (cmd) and type:

node -v <enter>

If it isn’t installed you obviously won’t get a version returned, otherwise you’ll see something like:

V6.11.0

We’ll install v6.11.2 in this case so here we go:

clip_image004

Click Next to continue …

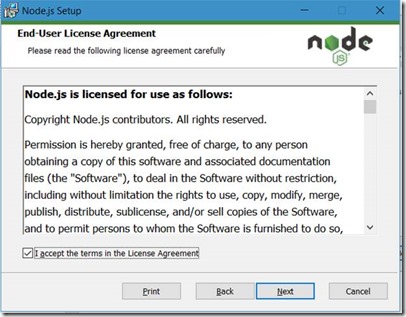
clip_image006

Check the checkbox to accept the License Agreement and click Next

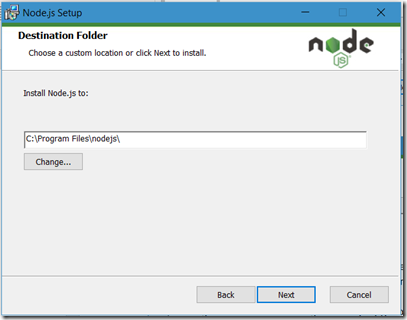
clip_image008

Select the Destination Folder (just leave as it is, or if you want it somewhere else change the path) and click Next to continue.

clip_image010

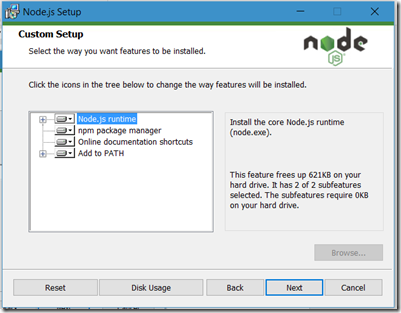
As you can see here is also the option to install the npm package manager. You’ll see later on that this tool will be used a lot to keep your installed packages up to date or just to install new packages. I just install all options here and click Next to continue.

clip_image012

Ready to install Node.js … Click Install!

Accept the security dialog to install in elevated mode and wait for the installer to finish up.

clip_image014

Done!

clip_image016

Click Finish to close the Node.js Setup Wizard and check the current installed version by opening a Command window (Windows Flag, Run, Cmd) and type

node -v <enter>

Result:

V6.11.2

NodeJS IX

In my next post, we’ll continue by installing Git and continue our endeavor to build our first JavaScript for Office Word Add-in.

In the meantime try to read some more about Node.js on their website: https://nodejs.org

To be continued …

Office Development – Word

clip_image002

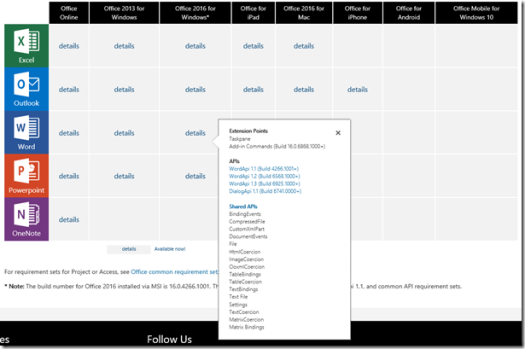
In my previous post I mentioned the confusion for the JavaScript APIs for Office in general. Today we’ll go deeper in and focus on the API support for the various Word clients. Let’s see what APIs are available for each of the Word clients in detail and finish off with the observations once we identified what is in each client for Word:

Word Online

Extension Points

Taskpane
Add-in Commands

APIs

Word API 1.1
Word API 1.2
Word API 1.3
Dialog API 1.1

Shared APIs

BindingEvents
CustomXmlParts
DocumentEvents
ImageCoercion
MatrixBindings
MatrixCoercion
Settings
TableBindings
TableCoercion
Text File
TextBindings
TextCoercion

Word 2013 for Windows

Extension Points

Taskpane

APIs

Dialog API 1.1

Shared APIs

BindingEvents
CompressedFile
CustomXmlParts
DocumentEvents
File
HtmlCoercion
ImageCoercion
MatrixBinding
MatrixCoercion
OoxmlCoercion
Settings
TableBindings
TableCoercion
Text File
TextBindings
TextCoercion

Word 2016 for Windows

Extension Points

Taskpane
Add-in Commands

APIs

Word API 1.1
Word API 1.2
Word API 1.3
Dialog API 1.1

Shared APIs

BindingEvents
CompressedFile
CustomXmlParts
DocumentEvents
File
HtmlCoercion
ImageCoercion
Matrix Bindings
MatrixCoercion
OoxmlCoercion
Settings
TableBindings
TableCoercion
Text File
TextBindings
TextCoercion

Note that there is a difference between the MSI installed version or the Office365 version. The MSI version only contains WordApi 1.1. according to the specifications.

Word for iPad

Extension Points

Taskpane

APIs

Word API 1.1
Word API 1.2
Word API 1.3
Dialog API 1.1

Shared APIs

BindingEvents
CompressedFile
CustomXmlParts
DocumentEvents
File
HtmlCoercion
ImageCoercion
Matrix Bindings
MatrixCoercion
OoxmlCoercion
Settings
TableBindings
TableCoercion
Text File
TextBindings
TextCoercion

Word 2016 for Mac

Extension Points

Taskpane
Add-in Commands

APIs

Word API 1.1
Word API 1.2
Word API 1.3
Dialog API 1.1

Shared APIs

BindingEvents
CompressedFile
CustomXmlParts
DocumentEvents
File
HtmlCoercion
ImageCoercion
Matrix Bindings
MatrixCoercion
OoxmlCoercion
Settings
TableBindings
TableCoercion
Text File
TextBindings
TextCoercion

Word for iPhone

Word for Android

Word Mobile for Windows 10

clip_image004

Observations

So, what do we see here? First observation is that cross platform now means that besides the good old Windows system, additional clients are limited to: “Office Online”, “Office for iPad” and “Office 2016 for Mac”. None of the phone clients have support for add-ins.

A second observation is that all other clients are more or less in par with each other. Only “Office 2013 for Windows” is limited to the DialogApi 1.1 and also none of the WordApis. It also does not support Add-in Commands. This makes you think if you should build your add-ins for Office 2013 or not at all. My guess is that the limitations on this platform are so significant that it would be better to only focus on Office 2016 and up.

Third observation is the missing support for Add-in Commands on Office for iPad. I’m curious to know why this is the case. I thought the iPad also had something like the right click (press and hold for menu) but maybe not. I don’t own an iPad -darn, do I really need to buy one now- so I can’t check this at this time.

Fourth observation is the missing Shared APIs on “Office Online”:

CompressedFile
File
HtmlCoercion
OoxmlCoercion

Maybe these four APIs are just not logical to have in an “Office Online” environment, but that too is a wild guess as I don’t know yet what it is used for.

I’m not sure yet where to go next. We now know what APIs are available for each of the Word Office clients, so I think the next step would be building a starter Add-in for Word 2016 for Windows. This client has the biggest set of APIs supported making me think that this is the best candidate to experiment on and later on see how this fans out to the other clients such as Word Online or the Apple options.

To be continued …

Office Development – API Confusion

API Overview Confusion-800

I started to dive in to the JavaScript API for Office. To get a starting point I started with Word as I’m very familiar with what is there already for VBA and VSTO and will allow me to give me a good starting point to compare.

The first thing you find when you start looking at the JavaScript API for Office is that there are two JavaScript Object models:

· Common APIs

· Host-specific

The Common APIs were introduced with Office 2013 and allows you to connect your add-in application with the Office client application. The object model has Office client specific APIs and APIs that target multiple Office host applications.

This is part of the Shared API and with this API you can interact with the content in Office documents (documents as in Documents, Worksheets, Presentations, Mail Items or Projects). With this API you can target Office 2013 and later. The Shared API is using the common API syntax and the object model used in this API uses callbacks.

Then there are the Host-specific APIs. These APIs were introduced with Office 2016. These APIs provide object models that are host-specific (duh-uh) but more important for stable software development: strongly typed objects that allow you to get some Intellisense in your development toolset.

The different API sets are a bit confusing and the documentation is not all that clear for you to find what is used by what host-application or that is using the Common API. There is a nice overview page that allows you to click on each host application and immediately showing you what API is supported:

API Overview II

Source: https://dev.office.com/add-in-availability

If you click on the details for Outlook for instance there are however Mailbox 1.0 to Mailbox 1.5 in the list but unlike the details for instance for Word or Excel these links are no hyperlinks so you are on your own with this (or maybe there just are no online references?)

Also, the references for Project or Access are not in the list at all. These are linked back to the Office common API requirement sets

I think you agree with me that this doesn’t make it all to clear, especially if you come from VBA or even VSTO. I’m not sure how you could document this better, I need more insights first to think about that. Next target will be to try to understand more about what is used where and when. One thing is relatively clear so far: You need to determine first what your target audience is. The host-specific APIs only target Office 2016 (and up?) to name one … decisions, decisions, decisions.

To be continued …

Office Development – Add-in Types, what did we have before?

Office-Development-VSTO_thumb.png

To research the ‘new’ Office JS Add-ins we need to know what types of add-ins there are. If you come from VSTO there is some similarity, add-ins can be divided in different types. Let’s see what we had before.

In VSTO you had the option to create Document Customizations aka Document-level customizations where the add-in was attached to the document or spreadsheet, Application-level customizations, here the add-in lives in the context of the host application like Word or Excel and Outlook Form Regions for customizations in Outlook

Project Type Feature Application
Document Level Customization Actions Pane Word

Excel

Custom Ribbon UI Excel

InfoPath

Outlook

PowerPoint

Project

Word

Visio

Backstage View Excel

InfoPath

Outlook

PowerPoint

Project

Word

Visio

Controls on Documents Excel

Word

Shortcut Menus Excel

InfoPath

Outlook

PowerPoint

Project

Word

Visio

Application Level Customization Custom Task Pane Excel

InfoPath

Outlook

PowerPoint

Word

Custom Ribbon UI Excel

InfoPath

Outlook

PowerPoint

Project

Word

Visio

Backstage View Excel

InfoPath

Outlook

PowerPoint

Project

Word

Visio

Outlook Form Regions Outlook
Controls on Documents Excel

Word

Shortcut Menus Excel

InfoPath

Outlook

PowerPoint

Project

Word

Visio

So, in general there are these options explained a bit:

  • Actions Pane/Task Pane (Depending Application or Document Level)

    This is the pane on the right of a document that allows you to interact with the document. In case of an Actions Pane this is attached to the document, while the Task Pane can be there independent of the document. They can both do arbitrary things, but the Actions Pane only appears with the document.

  • Ribbon UI adjustments

    Adding your own Ribbon with controls on it. VSTO can add almost every Ribbon Control available.

  • Backstage View

    Backstage View is the view that you see when you select the File Tab. This allows you to add a special tab in there for whatever you want to show there. Some limitations apply

  • Outlook Form Regions

    Outlook Form Regions extend the way you work with your mail. There are options to just add a small part on top of the mail item or take over the full real estate. You can specify when this happens, will it be only in compose or read mode? You decide.

  • Controls on Documents

    With this feature you can enhance the document with extra controls on top of the document surface. The controls are not always persistent and you may need to re-create the controls each time you open the document if you want them to appear again.

  • Shortcut Menus

    These are the context menus. Right click on the document and add extra function call options within the right-click-menu to allow the user to do specific tasks related to the position of the caret (insertion point where the cursor resides).

This is quite a lot of functionality and also keep in mind that from most of these features you can do the craziest things because you can extend the Task Panes/Action Panes with either Windows Forms but also XAML interfaces. The other features can use the full .NET Framework stack so you can do everything you want.

The challenge is now to see if we can get the same things with Office JS Add-ins. Obviously you don’t want to fall back into a limited feature set. On the other hand, there is the fact that it needs to run on multiple platforms. That can be a limiting factor.

Given this summary I now have a goal to what to look for in the ‘new’ world.

To be continued …

Office Development–The Good

Office Development - Good

So after a small introduction to the “Ugly” VBA, the “Bad” VSTO, we end with the “Good” … well end … I guess the end is just the start of a new experience of an Office Development platform not familiar to most people. It is not included in the box like VBA, not using the languages most Microsoft developers are familiar with.

So what is it? Office Add-ins, yes … this time with the capital A, indicating that we discuss the –new- way of developing Office customizations, are built using well known web development technologies like HTML, CSS and JavaScript.

By doing so Office Add-ins run across multiple versions of Office:

  • Office for Windows Desktop
  • Office Online
  • Office for the Mac
  • Office for the iPad

This is most likely not all, with Office emerging on other platforms like Android and Linux distributions these options will be on the shortlist as well. We will research these options on a later time.

So how does this work?

The architecture is a little bit different than the other technologies, although you can debate that the Office Add-ins mechanism looks like the way it was done with VSTO.

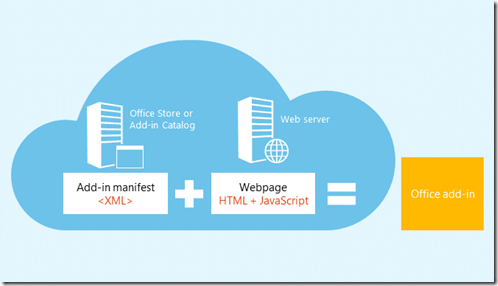
This is how it looks like with the JavaScript Office Add-ins:

DK2_AgaveOverview01

There is an Add-in manifest in the XML format and a web solution hosted on an arbitrary web server. The image shows HTML + JavaScript but it can be more than that as long as valid web technologies are in place. The manifest contains all sorts of settings (we’ll dive in to see what is in there also later on) and it defines what Office clients are used and what it needs to run.

The Office JavaScript API first implemented some basic Excel features and even less Word features but today many more clients are supported and the Excel and Word features are getting more mature over time. The JavaScript API for Office contains objects and members that you need to build your add-ins and interact with content in your Office documents and web services.

If you look at the API you will see that you recognize a lot of your ‘old’ Office Object Model. Some are close to what they were, others needed to be adjusted and there are also new options.

Ok, the starter is here … in my next posts I will pick each of the items and look at the details. As I said earlier, this for me is probably like you a learning experience. I’ve been looking at it for years now in a helicopter/management overview but I decided I need to learn the ins and outs of the new platform. While doing so I try to teach you as well by blogging about it. Trying to keep it simple and getting more complex over time.

Let’s see if Office Add-ins are really the “Good” as advertised and can they do the same as we can do with VSTO add-ins….