Office Development – Live Coding

SDN Cast - Live Coding - Office Development 1

Last two years I have been webcasting every Thursday at 8PM GMT+1/CET on our SDN Cast with my buddies Marcel Meijer, Fanie Reynders and recently added as fourth member Gerald Versluis. In this webcast we on a weekly base discuss the news, events on Software Development and added some demos. Usually the webcast was in Dutch but when we had international guests we shifted to English.

Running the webcast is fun, informal and sometimes high level on discussions when talking about Software Development. Last couple of weeks Fanie Reynders and I have been researching to extend our webcasts with actual live coding sessions. Fanie is focusing on his expertise dotNET Core and I am focusing on Office Development.

Hopefully we will also bring in Gerald Versluis coding on Xamarin and related stuff.

So, starting last Tuesday I started (and planned to do this every next Tuesday in the upcoming weeks) my first Live Coding session on Office Development. Basically I started with where I started blogging about the ‘new’ Office Add-ins

Older Office Development Blog Posts starting here:

https://maartenvanstam.wordpress.com/2017/07/20/office-development-2017/

A lot of time went by, and what I liked to do is looking back on my blogposts and see if they still can stand the shift in time all the way to 2019.

In my first Live Coding session I immediately jumped in to building the first Word Add-in in two ways, one in Visual Studio 2019 (Preview!) and one using Yeoman. I did realize however that I probably should have discussed a bit of starting information first, just like I did in my blog posts. I might jump back a bit in the next Live Coding session next Tuesday February 5 (Click <- to see when this will be in your location)

SDN Cast - Live Coding - Office Development 1 YouTube 

You can find the recording of my first Live Coding session here on YouTube:
https://www.youtube.com/edit?video_id=QivUh9Kyyos

Also you can find another recording on Twitch:
https://www.twitch.tv/videos/371899703##

If you want to follow our Live Coding events (and other SDN Cast webcasts) make sure you subscribe on YouTube or follow me on Twitch!

My weekly Live Coding – Office Development webcasts will always be in English (as far as my English goes that is, pretty sure you’ll get the Dutch dialect for free Smile) so everyone in theory should be able to follow what I am doing. It is still work in progress.

Fanie and I are still researching and working on the streaming tools, there is a lot going on producing live webcasts so don’t kill us if we get a crappy chatroom or other bad widgets in the first couple of weeks Winking smile.

Hope to see you in our next Live Coding sesions!

Office Development–How to reach the Office Extensibility Platform team

StackOverflow

A long time ago, I answered a lot of questions in the so called Microsoft Forums assisting the community with VSTO issues. The forums still exist (https://social.msdn.microsoft.com/Forums/vstudio/en-US/home?forum=vsto), but are not the main access point anymore if you want to reach the Office Extensibility Platform team with your questions or issues.

These days https://www.stackoverflow.com is the center of the Universe (well… not really but if you have developer related questions it is … sort of …).

StackOverflow is a huge knowledge base of information formed out of an even bigger stack of questions from the community answered by not only the community but also from many of the ‘real’ product groups. If you are building your Add-ins using OfficeJS your can go to:

https://stackoverflow.com/questions/tagged/office-js

This “office-js” tagged group of questions is actively monitored by the Office Extensibility Platform team and you might recognize many of the team members as being the ones answering your questions (or apologizing if you reached an issue). By asking your questions in there the information around it is automatically functioning as future reference item.

You’ll notice, if you Google for a specific issue or question, that you’ll hit StackOverflow simply because you often won’t be the only one with that question. Big chance that the answer is already available and that will save you the time to submit the question.

Remember, that by submitting your question, you are not only helping yourself but you’ll help many others arriving at a later time with the same question.

And … while you are at it, try to answer some of the open questions if you know the answer. It will provide you ‘reputation’ points that may help you even more. The more reputation points you get the more you are ‘credited’ with features. If your reputation is high enough you’ll be able to moderate questions with a group of peer moderators, and if it is really high you can moderate without confirmation of other moderators. You basically build trust by doing good.

BTW, the office-js tag is not the only tag where the team lives, other examples and my favorite tags:

image

Note that VSTO is also in there:
https://stackoverflow.com/questions/tagged/vsto
so if you have questions on the good old VSTO tools this is your go to place Winking smile

Office Development – Word Add-in in Visual Studio ‘in action’

Yesterday in my blogpost I showed you the instructions to perform to create your first Word Add-in not by command line tools like I showed earlier, but by using Visual Studio 2017. So here it is:

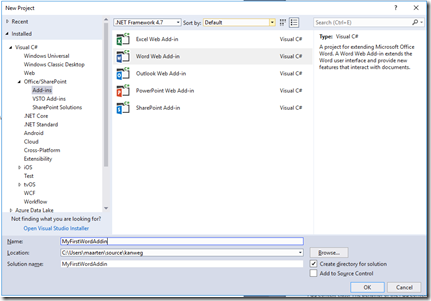
Boot up your Visual Studio IDE and select File, new Project. In the New Project Dialog select on the left hand of the dialog the tree item Add-ins under the Office/SharePoint node. On the right hand you get options to build Add-ins for Excel, Word, Outlook, PowerPoint and SharePoint.

 FirstVSAddin01

They still call it Web Add-in, if you ask me this name is a bit outdated. I believe the Add-ins are called just Office Add-ins (with the capital A). There was a time these things were called “Apps for Office”. The name used today on the http://dev.office.com website is:

Apps for Office

Where were we? …. Oh, yes … Creating a new project. Name your new project any name you would like to give it, I opted for MyFirstWordAddin. Change the folder if you want to store it somewhere else other than the default project output path and click OK to start creating your project. If all goes well you’ll see the following ‘progress’ bar appearing on your screen.

FirstVSAddin02

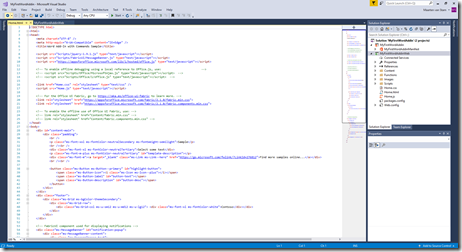
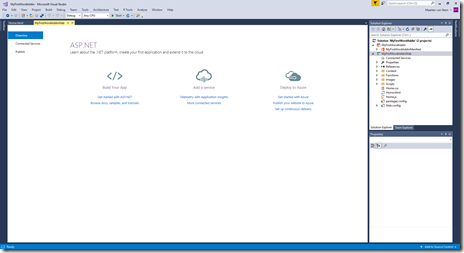
It takes a couple of minutes to finish, but when it does it will open a code window like this:

FirstVSAddin03

And another tab was created to show you some helpful links to continue:

FirstVSAddin04

Now it is time to hit F5, the “Visual Studio Compile-Run-Debug Experience”. As we have seen ancient times ago the Office Dev team really tried to hide all the difficult stuff for you and it will create for you the security context to be able to actually run the Word Add-in without going through the hassle I described in other posts creating the Add-in using the command line tools like Yeomen.

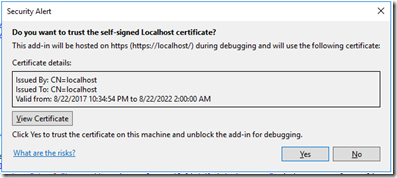
The only dialog might get to see in between is this one:

Cert1

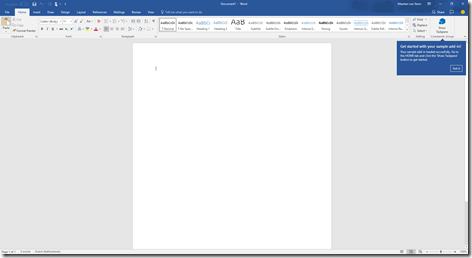
A one time only trust entry for your self-signed Localhost certificate. You’ll notice if you create a second project this dialog won’t show again as you already trusted it for your first project. Click Yes otherwise your Add-in won’t be trusted to run. It will create the security context and an instance of Word is created and installed the just created Add-in.

On the top right hand in the Ribbon in the Home Tab a button appears in the Commands Group with some easy instructions. You’ve seen as similar button and instructions on the command line Add-in we created a while ago.

FirstVSAddin05

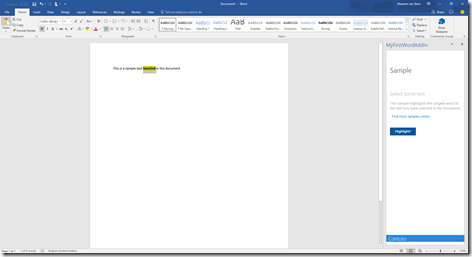
Click the button to have the Task pane appearing on the right hand. The sample Task pane wants you to select a couple of words in the document and if you press the Highlight button it will calculate the word with the most characters and highlights the word.

FirstVSAddin06

That is all there is to it … no fancy pansy difficult stuff to get around creating certificates and trusting the certificates. It is all done for you by the Visual Studio tooling. Impressive!

Beware however, you are not ready for production – just like the command line Add-in tools, the certificate is self signed, you are not running the ‘ web app’ in a shared (public) location to be able to access from anywhere and anytime. It is still ‘demo-ware’. Hopefully over time we will reach the golden moment of creating ‘production-ware’ Smile

To be continued …


Office Development – Word Add-in – Using Visual Studio

Office Development - Visual Studio

A while ago, not too long, I showed you how to start developing your Word Add-in from scratch using nothing but command line tools. Check my blog archives for the last couple of weeks if you missed that. Today we are looking at the same process but now using Visual Studio.

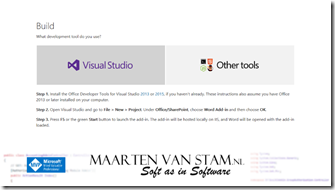
Where to begin? According to the page: https://dev.office.com/getting-started/addins going through the process of steps you select Word as Add-in host, and Visual Studio as tools to build your Add-in will finally show you the following screen:

image

It is already hopelessly outdated, mentioning to install the Office Developer Tools for Visual Studio 2013 or 2015 while Visual Studio 2017 has been around for quite some time.

The process however is still unchanged for the most part, I will show it in practice in a later blog, but if you follow the three steps you are basically already there, where without Visual Studio and just using the command line tools we had to go through a large series of requirements and certificate fixes to make that work.

Apparently Visual Studio takes a lot of this out of your hands and is doing all that for you. Not completely fair, because with Visual Studio you also need to go through the installation process. I want to find out what this all is and put that in a blog post as well

To be continued …

Office Development – Book: Building Office Add-ins using Office.js

clip_image002

While looking for references and/or resources to support my research on the ‘new’ Office Add-ins I repeatedly stumbled over the sample chapters of one book in particular:

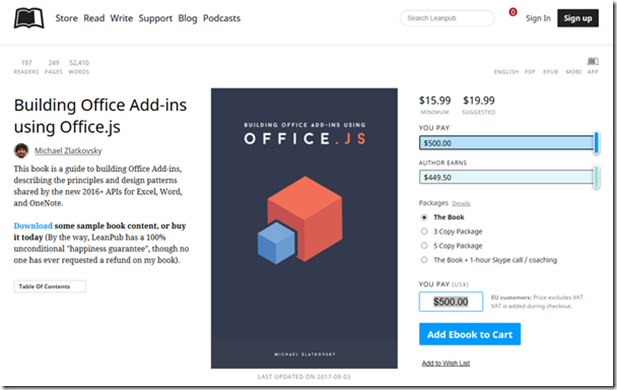
Building Office Add-ins using Office.js

https://leanpub.com/buildingofficeaddins

The book is published on LeanPub and this means that it is work in progress. The author is continuously working on the manuscript and is potentially never finished. Even the pricing is flexible, the author specified a minimum and a recommended fee. You can decide if you want to pay the minimum, recommended or even a higher amount for the book. At this time, the minimum is set to $15.99 and the suggested price is set to $19.99 but as said you can up the price to $500 if you like Smile

clip_image004

You don’t have to worry the information provided is legit, the book is written by Michael Zlatkovsky who works at the Office Extensibility Platform team at Microsoft. The information is therefor right from the source, even better … Michael has been a key participant in the design of the new Office 2016 wave of Office.js APIs:

https://leanpub.com/u/Zlatkovsky

Michael and I go back quite some time already, I met Michael years ago, I thinks around 2012, when we were all still developing VSTO Add-ins. Michael always was very helpful and supporting when I needed information or struggled with issues.

Now get on over to LeanPub site and buy the book!

Did I mention already where to get it?
https://leanpub.com/buildingofficeaddins

I’m sure it will help you and me in learning the details of developing Office Add-ins using Office.js

Office Development – Word.RequestContext vs Word.run

MinimalCode 2

Yesterday we’ve seen the minimal code running to insert a bit of text at the selected Range using Word.RequestContext:

(() => {

   async function MinimalWordmethod() {

      // Create the client request context. You’ll do this for all Word add-ins.

      var ctx = new Word.RequestContext();

      // Do your things here, such as ..

      var range = ctx.document.getSelection();

      range.insertText("Test MinimalWordMethod", "After");

      await ctx.sync();

   }

   MinimalWordmethod();

})();

If you look however at the boilerplate code that is generated with a clean Yeoman project you find that RequestContext is never used, but instead of this you see Word.run(async (context) => { … });

Why is this and what is the difference? Well, I looked into this and found the answer on a piece of documentation from Michael Zlatkovsky, member of the Office Extensibility Platform team, here:

http://buildingofficeaddins.com/run

Michael explains it in his documentation but is written for Excel, however as you can read on the same page it is fully compliant with Word.run.

Here is a quote from the page:

You can think of the Excel.run as a boiler-plate preamble; it is the batch function that is the star of the show, but it needs a request context in order to start off the chain of OM calls. The Excel.run call is simply a means to that end, as it creates a new request context that it passes into the batch function.

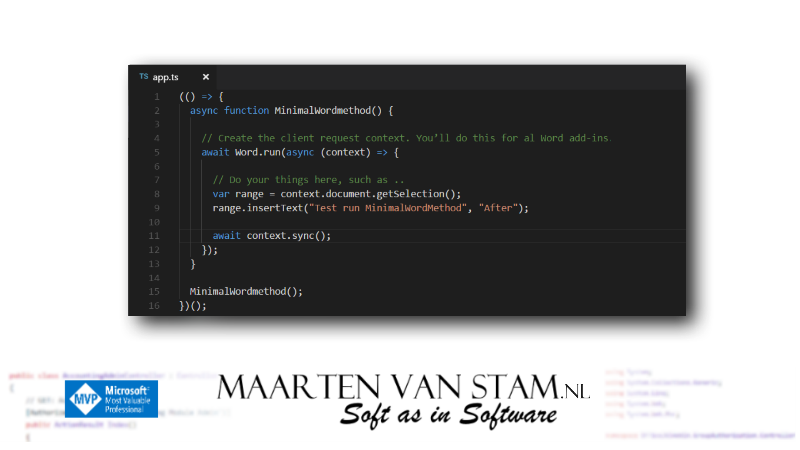
Reading this quote explains that by using the <host>.run function you start a batch process, without the trouble of creating your context by yourself. The run function will take care of this for you. So instead of the code where you create your own context object as seen in the snippet above you should be able to run the following code:

(() => {
   async function MinimalWordmethod() {

         // Create the client request context. You’ll do this for al Word add-ins.
         await Word.run(async (context) => {

         // Do your things here, such as ..
         var range = context.document.getSelection();

         range.insertText("Test run MinimalWordMethod", "After");

         await context.sync();
      });
   }
   MinimalWordmethod();
})();

How to get the new minimal code running

Go back to the Yeoman project from yesterdays post, open the project folder and open the file app.ts in the src source folder.

Replace all the code from this file as seen in the top snippet with the code from the second, new snippet above. Save it and start your Add-in ‘server’ by running npm start in the root of your project.

Opening Word, with the installed Add-in will still show you the Add-in button:

addin7_thumb

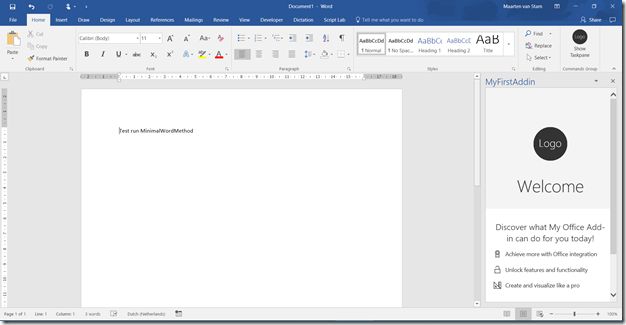
By clicking the button the Taskpane is showing, just like we’ve seen before, but now you should see the words “Test run MinimalWordMethod” in your document:

MinimalCode3

Without creating your own context the Word.run function created its own context and the code still works. As you can see this helps you to take some effort out of your hand.

To be continued …

Office Development – Minimal Code in practice

MinimalCode

Returning on my last ‘minimal code’ blog post, I promised to get back on this to see how this works in practice. One of my question marks I added to the post was that I wondered why the Yeoman boilerplate was using run instead of RequestContext where run passed a context parameter as opposed to the RequestContext where actively a context is requested before accessing the Word object model.

I think I found an answer to that, but will save this to a later date as I first want to make sure the minimal code I provided would work and I found some issues in the original posted code that didn’t seem to be correct.

Here is the updated code that should work in real life:

(() => {

   async function MinimalWordmethod() {

      // Create the client request context. You’ll do this for al Word add-ins.

      var ctx = new Word.RequestContext();

      // Do your things here, such as ..

      var range = ctx.document.getSelection();

      range.insertText("Test MinimalWordMethod", "After");

      await ctx.sync();

   }

   MinimalWordmethod();

})();

How to get the minimal code running

If you go back to the Yeoman project instructions in this post (and fixed the certificate issues in post Office Development – Fixing Trusted Authority – Word Client and https://maartenvanstam.wordpress.com/2017/08/07/office-development-fixing-certificate-issue-with-openssl-certificate/) you should already have a working Word Add-in.

Open the project folder (or if you already deleted it quickly create a new one following my instructions from my earlier blogposts) and open the file app.ts in the src source folder.

Replace all the code from this file with the code above, save it and start your Add-in ‘server’ by running npm start in the root of your project.

Opening Word, with the installed Add-in (again, if you already dropped it follow my other blogposts earlier this month to install it) will show you the Add-in button:

addin7

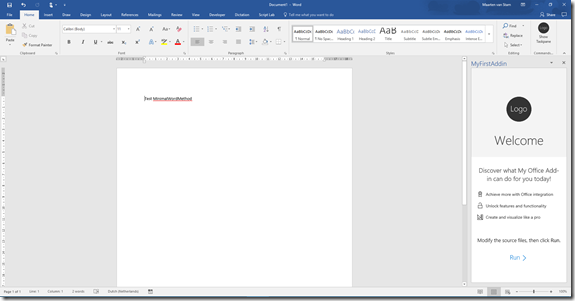
By clicking the button the Taskpane is showing, just like we’ve seen before as we haven’t changed the Taskpane ‘web’ code, but now you should see the words “Test MinimalWordMethod” arriving in your document:

MinimalCode2

As you can see the code worked! Here is how:

MinimalWordmethod();

This line is automatically triggered when the code is running on startup of the Add-in. By doing so inside the MinimalWordmethod a context is requested in this line:

var ctx = new Word.RequestContext();

If the context is returned correctly you now can access the Word object model to access parts of the document. In this case we access the selected Range object and insert the text right after the Range:

var range = ctx.document.getSelection();
range.insertText("Test MinimalWordMethod", "After");

Instead of having this executed immediately like we’ve seen in VBA or VSTO, the text is only inserted after calling the sync method on the context. In the JavaScript APIs for Office calls to Office are handled asynchronously and to work with that the await and async keywords can be found in the code.

Very simple and basic code, but there are some drawbacks you need to keep in mind. For instance, because things are async, how do you know what the right order is how things are processed. And what about batch processing of boatloads of instructions? Will this all be handled correctly, and what if there are dependencies between the batched instructions? All of these questions arise when looking at this little piece of code, and we need to address all of that in later posts.

To be continued … It’s a never ending story Smile

Office Development – Word Add-in, minimal code

So far it has been fairly complex, installing lots of components and doing all sorts of things before you get things to work. But what do you need for code to do just the minimal thing in a Word Add-in?

Initially it is said that a context is required by requesting a new context:

var ctx = new Word.RequestContext();

With this context you can do things the things you’d like to do.

function MinimalWordmethod() {
  
// Create the client request context. You’ll do this for al Word add-ins.

   var ctx = new Word.RequestContext();

   // Do your things here, such as ..
   var range = ctx.document.getSelection();

   ctx.executeAsync()
     
.then(function () {})
     
.catch(function(error){
        
console.log("ERROR: " + JSON.stringify(error));
     
});
}

Interesting part is that this RequestContext is not to be found in the Yeoman boilerplate, so it looks like it is initialized by the framework these days …

I want to find out where this happened in the Yeoman boilerplate. As far as I can tell the documentation is not all too clear about this.

To be continued too Winking smile

Office Development – Coding in Script Lab

clip_image002

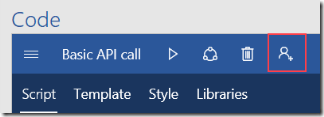
One of the nice things in Script Lab is that you can connect it to GitHub allowing you to share your code snippets or import code snippets from other people. If you opened the Script Lab Task Pane you will notice this little person icon with an even smaller plus sign.

clip_image004

With this button you can authorize Script Lab to access your GitHub account where it needs read and write access to read or write Gists. According to GitHub:

Gists are a great way to share your work. You can share single files, parts of files, or full applications. You can access gists at https://gist.github.com.

A great option to either store your scripts that you created by Script Lab for your own use but even better: to share the code with others. Get feedback, or simply make someone happy by providing the code to the community!

Clicking the button will ask you for your permission on your GitHub account. The permissions are not all that shocking, you just give permission to create, edit and get Gists from your account to be able to show it in Script Lab.

clip_image006

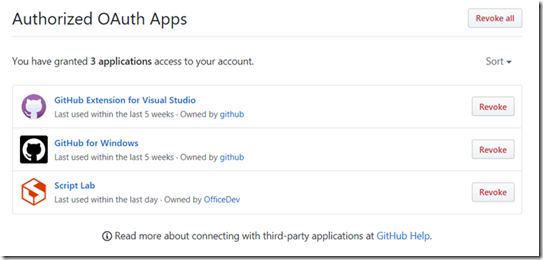
After providing your authorization you can go into your GitHub account and see the permission you just granted to Script Lab:

clip_image008

From there you can also revoke the permissions if you think they shouldn’t need the access anymore. In general, it is a good idea to go in there every now and then to evaluate who can access your code and are they still in the position where they need access. Over time the number of permissions can grow while maybe you don’t use many of the services anymore. If so, time to clean up while you are at it!

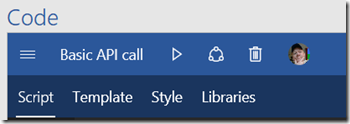
Now that you provided access to your Gists you’ll notice the little person icon changed into your profile icon:

clip_image010

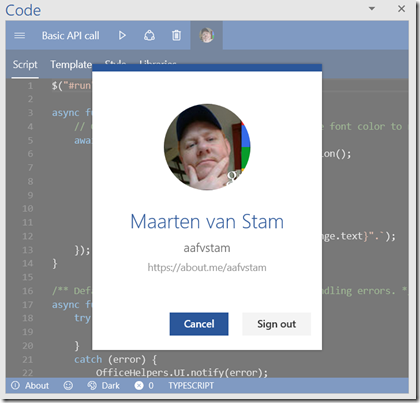
Clicking the little profile icon will allow you to see the attached GitHub account and if you like, just to sign out of your account. Cancel will bring you back into Script Lab (I probably would have titled the button “Close” instead of “Cancel”, not it gives you the impression that Cancel will disconnect the GitHub account from Script Lab, but it doesn’t).

clip_image012

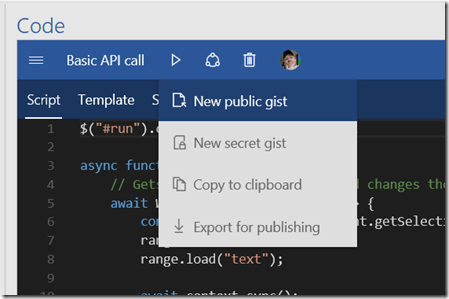
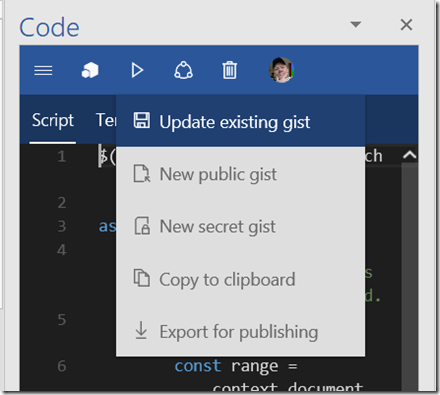
Now, your GitHub account is connected to Script Lab you can share your code snippets to Gists on GitHub. This is done through the “ Share” button. The share button has options to:

Publish a new Public Gist (for everyone to see), a new Private Gist (for your eyes only), Copy to Clipboard or to export the snippets:

clip_image014

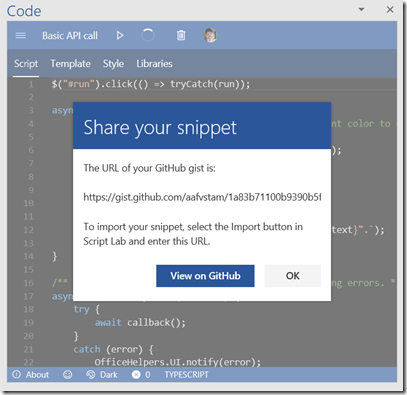
Using the option “New public gist” will push the content you created in Script Lab to GitHub. Make sure that before you do this the title property of the Script Lab project is what you want to call it. This will be adopted by GitHub as you’ll see a bit further down in this blogpost. The confirmation looks like this and will provide you the URL of the Gist that you just created. With this URL you can import the Gist at a later time.

clip_image016

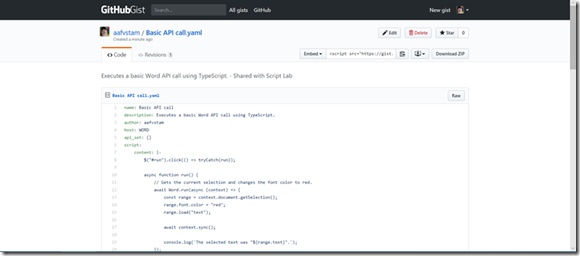
If you take the URL and open it in the browser you’ll see your code on GitHub:

clip_image018

It created a new Gist, nicely formatted on GitHub and the menu changed into “Update existing gist”. If you edit your code, push the “Update existing gist” option Script Lab will go out to GitHub again and save the changes.

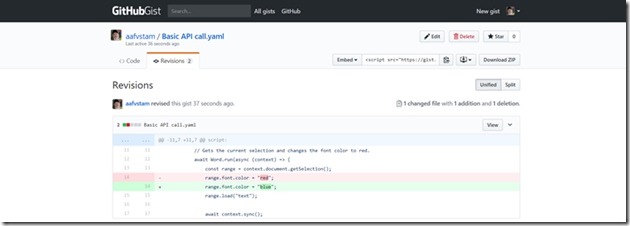
clip_image020

This is how it looks like on GitHub. Going into the revisions tab you can see that the line where I changed the color was updated. The line with color red was removed and replaced by the line with the color blue in it.

clip_image022

How to restore your gist?

On GitHub if you navigate to your gist you can find on the top right the URL that comes with the gist. Obviously you can also just use the URL you just used to navigate, but GitHub will provide you several other options such an embedded url to put it on your website or clone the code. Here we copy the URL:

clip_image024

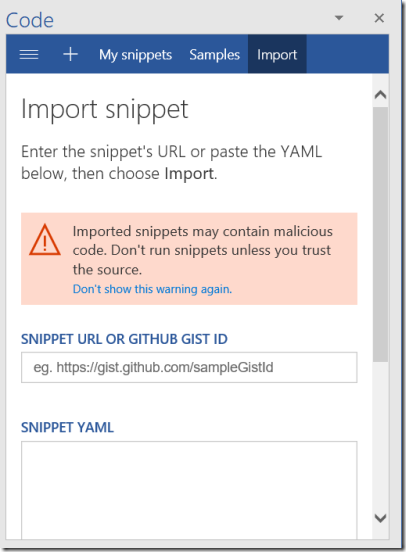
Next you go into the Script Lab menu (the ‘hamburger’ menu top left) to show you the Import option. Clicking the Import option provides you with a new dialog where you can enter the snippet URL or GitHub Gist ID:

clip_image026

Enter the URL and import the snippet. Now your Script Lab is filled with the code from the Gist, ready for you to continue your coding.

In follow-up blogposts, I will use this to test and experiment with some of the JavaScript for Office (aka OfficeJS) APIs. I really like this export option to gists. Maybe I will build a small collection of snippets for all the tested APIs for later reference.

Office Development – Installing Script Lab

Yesterday in my blog a short introduction to Script Lab, the Microsoft Garage project to work in some sort of a playground to develop your JavaScript for Office scripts so you can test-drive your code that you plan to use in your Add-in.

Today I will go over the installation process of Script Lab. Step by step I’ll follow the instructions and see what this looks like. How hard can it be ‘ey?

To start installing navigate to https://aka.ms/getscriptlab. It looks like this:

clip_image002

Click the Add button to arrive at the guided installation page:

clip_image004

To stay in the mood, we select Word again. I’ll will be using other clients like Excel or PowerPoint soon, but to be consistent I’ll select Word again. This will provide you with a comparable environment and maybe you get used to it. Now, to open in Word click the “Open in Word” option. This will ‘warn’ you that you are about to switch applications:

clip_image006

As this is the plan, you want to move into Word instead of staying in Microsoft Edge. Select ‘Yes’ to go on. This will launch Microsoft Word 2016 (assuming you have Office 2016 installed):

clip_image008

A document is opened, but not without warning. Because you open the document from the dark and dangerous Internet you are provided with a warning and start in the Protected View of Office:

clip_image010

In this case we tend to trust Microsoft in this we continue our journey by pressing “Enable Editing” but now we run into a second warning because the document also contained a Task pane that wants to run the Script Lab Add-in.

clip_image012

Again to make you feel safe, you don’t want any add-in to kick in without your confirmation, you get the option to “Trust this add-in” or “See Details”.

clip_image014

If you click “See Details” they bring you back to base. The installer page is provided where you can read information about the add-in. I guess you already did that, otherwise you wouldn’t get this far in the installation process (unless you just trusted my simple introduction and went ahead ). For now, not all that interesting, so we close this and leave it for what it is.

clip_image016

We go ahead, and decide to trust this add-in. This will bring us the Script Lab tab:

clip_image018

Showing you a balloon with the text “Code, Run and share your Add-in snippets directly from Office” and a “Got It” button to confirm:

clip_image020

Click the Script Lab and you’ll see a ribbon appear with the options:

Code, Run, Tutorial, Help, Reference Docs and Ask the Community

clip_image022

The most obvious thing to do would probably be to go through the Tutorial, at least that was what I picked as a starting point. The interesting thing is however that the Tutorial brings you to an Excel environment to explain you what you can do with the Add-in:

clip_image024

You basically go through all the same steps again, but ending up in Excel showing you all the same options. Open a script-lab-tutorial.xlsx from script-lab.azureedge.net :

clip_image026

This is an Excel starter document with more information about the Add-in and guiding you through the options:

clip_image028

Again the little Protected View warning and the Enable Editing button.

clip_image030

It didn’t provide me with the Script Lab Add-in tab though, only the instructions that you also saw when running the Word installer, except now for Excel.

clip_image032

This wasn’t really what I was looking for, probably useful if I just started from Excel but I didn’t. I went through the GitHub issues and noticed that getting a Word Tutorial is still in planning. Some patience here.

For now, at least the Word Script Lab Add-in is installed and ready to use.

To be continued