Happy 2020

It’s been a while, almost year, here … and whenever there is a new year, we pick up our resolutions from last year and see what we can do that we missed progressing the past year. Blogging is one of these things … so let’s pick this up again for now and see where it ends.

In my professional work I’ve been limited in doing things programmer-wise, more a people manager than coding manager at this time. Trying to get our foreign team up and running and at sometimes actually deliver some products. Doing so means I have almost no time at all to do programming.

For this reason, I decided to go on and do the Live Coding thing. Forcing me to go live in front of a camera and coding live on screen is pushing me to keep my coding skills on par. Not easy as what you learn today is outdated tomorrow, but boy … the things you can do in code these days are absolutely amazing!
So join me in my Live Coding sessions on Twitch. You can find my channel here:

https://twitch.tv/MaartenVanStam

Hit the follow button if you are, like me, too lazy to look up the broadcast schedule so you get notified whenever I get online to do the Programming Thing.

At this time I’m working on two main topics:

· Office Development (Who would have guessed?) where I’m trying to do the same things that I was able to do using VSTO to build my Add-ins. Spoiler Alert: You can’t do everything you were able to do with VSTO, but you can do some cool shit anyway …

· Blazor Web Development, building web sites using C# and .NET Core … where Office moved away from .NET to Web Technologies .NET did exactly the other way around and is now focusing on Web Technologies!

Let me know what you think about all these new and not so recent technologies … will they save the world?

Office Development – Word Add-in in Visual Studio ‘in action’

Yesterday in my blogpost I showed you the instructions to perform to create your first Word Add-in not by command line tools like I showed earlier, but by using Visual Studio 2017. So here it is:

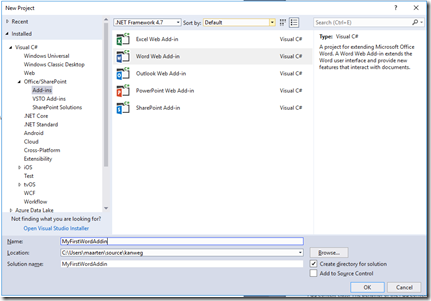
Boot up your Visual Studio IDE and select File, new Project. In the New Project Dialog select on the left hand of the dialog the tree item Add-ins under the Office/SharePoint node. On the right hand you get options to build Add-ins for Excel, Word, Outlook, PowerPoint and SharePoint.

 FirstVSAddin01

They still call it Web Add-in, if you ask me this name is a bit outdated. I believe the Add-ins are called just Office Add-ins (with the capital A). There was a time these things were called “Apps for Office”. The name used today on the http://dev.office.com website is:

Apps for Office

Where were we? …. Oh, yes … Creating a new project. Name your new project any name you would like to give it, I opted for MyFirstWordAddin. Change the folder if you want to store it somewhere else other than the default project output path and click OK to start creating your project. If all goes well you’ll see the following ‘progress’ bar appearing on your screen.

FirstVSAddin02

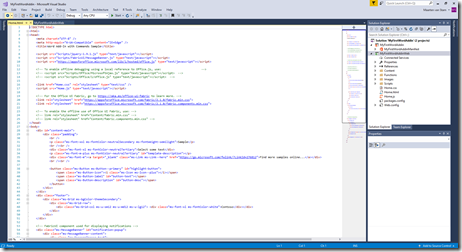
It takes a couple of minutes to finish, but when it does it will open a code window like this:

FirstVSAddin03

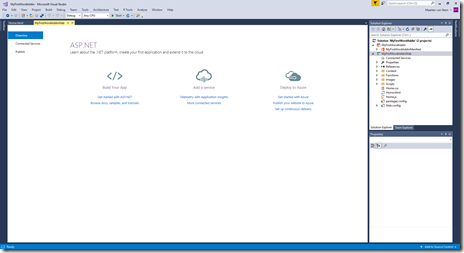
And another tab was created to show you some helpful links to continue:

FirstVSAddin04

Now it is time to hit F5, the “Visual Studio Compile-Run-Debug Experience”. As we have seen ancient times ago the Office Dev team really tried to hide all the difficult stuff for you and it will create for you the security context to be able to actually run the Word Add-in without going through the hassle I described in other posts creating the Add-in using the command line tools like Yeomen.

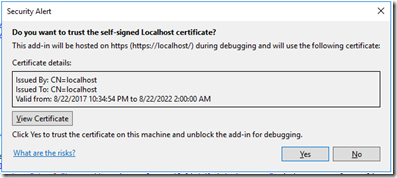
The only dialog might get to see in between is this one:

Cert1

A one time only trust entry for your self-signed Localhost certificate. You’ll notice if you create a second project this dialog won’t show again as you already trusted it for your first project. Click Yes otherwise your Add-in won’t be trusted to run. It will create the security context and an instance of Word is created and installed the just created Add-in.

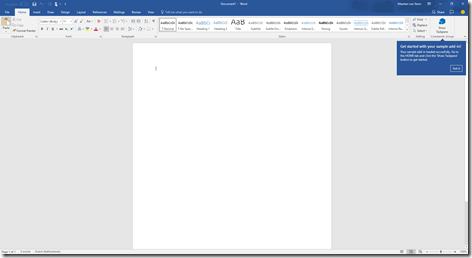
On the top right hand in the Ribbon in the Home Tab a button appears in the Commands Group with some easy instructions. You’ve seen as similar button and instructions on the command line Add-in we created a while ago.

FirstVSAddin05

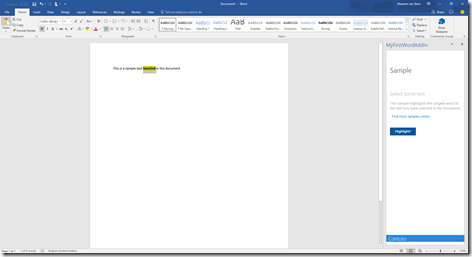
Click the button to have the Task pane appearing on the right hand. The sample Task pane wants you to select a couple of words in the document and if you press the Highlight button it will calculate the word with the most characters and highlights the word.

FirstVSAddin06

That is all there is to it … no fancy pansy difficult stuff to get around creating certificates and trusting the certificates. It is all done for you by the Visual Studio tooling. Impressive!

Beware however, you are not ready for production – just like the command line Add-in tools, the certificate is self signed, you are not running the ‘ web app’ in a shared (public) location to be able to access from anywhere and anytime. It is still ‘demo-ware’. Hopefully over time we will reach the golden moment of creating ‘production-ware’ Smile

To be continued …


Office Development – Word Add-in – Using Visual Studio

Office Development - Visual Studio

A while ago, not too long, I showed you how to start developing your Word Add-in from scratch using nothing but command line tools. Check my blog archives for the last couple of weeks if you missed that. Today we are looking at the same process but now using Visual Studio.

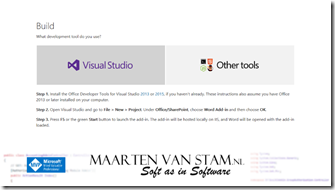
Where to begin? According to the page: https://dev.office.com/getting-started/addins going through the process of steps you select Word as Add-in host, and Visual Studio as tools to build your Add-in will finally show you the following screen:

image

It is already hopelessly outdated, mentioning to install the Office Developer Tools for Visual Studio 2013 or 2015 while Visual Studio 2017 has been around for quite some time.

The process however is still unchanged for the most part, I will show it in practice in a later blog, but if you follow the three steps you are basically already there, where without Visual Studio and just using the command line tools we had to go through a large series of requirements and certificate fixes to make that work.

Apparently Visual Studio takes a lot of this out of your hands and is doing all that for you. Not completely fair, because with Visual Studio you also need to go through the installation process. I want to find out what this all is and put that in a blog post as well

To be continued …

Office Development – Book: Building Office Add-ins using Office.js

clip_image002

While looking for references and/or resources to support my research on the ‘new’ Office Add-ins I repeatedly stumbled over the sample chapters of one book in particular:

Building Office Add-ins using Office.js

https://leanpub.com/buildingofficeaddins

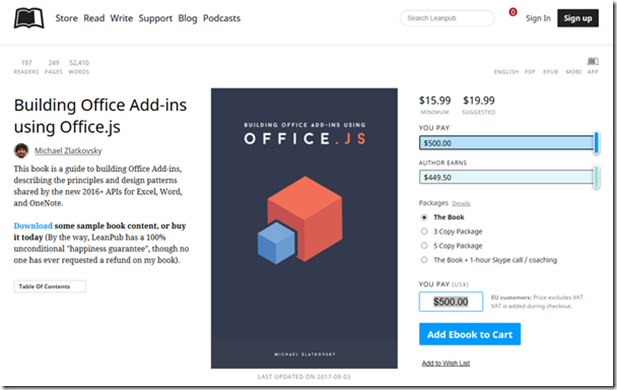
The book is published on LeanPub and this means that it is work in progress. The author is continuously working on the manuscript and is potentially never finished. Even the pricing is flexible, the author specified a minimum and a recommended fee. You can decide if you want to pay the minimum, recommended or even a higher amount for the book. At this time, the minimum is set to $15.99 and the suggested price is set to $19.99 but as said you can up the price to $500 if you like Smile

clip_image004

You don’t have to worry the information provided is legit, the book is written by Michael Zlatkovsky who works at the Office Extensibility Platform team at Microsoft. The information is therefor right from the source, even better … Michael has been a key participant in the design of the new Office 2016 wave of Office.js APIs:

https://leanpub.com/u/Zlatkovsky

Michael and I go back quite some time already, I met Michael years ago, I thinks around 2012, when we were all still developing VSTO Add-ins. Michael always was very helpful and supporting when I needed information or struggled with issues.

Now get on over to LeanPub site and buy the book!

Did I mention already where to get it?
https://leanpub.com/buildingofficeaddins

I’m sure it will help you and me in learning the details of developing Office Add-ins using Office.js

Office Development – Word.RequestContext vs Word.run

MinimalCode 2

Yesterday we’ve seen the minimal code running to insert a bit of text at the selected Range using Word.RequestContext:

(() => {

   async function MinimalWordmethod() {

      // Create the client request context. You’ll do this for all Word add-ins.

      var ctx = new Word.RequestContext();

      // Do your things here, such as ..

      var range = ctx.document.getSelection();

      range.insertText("Test MinimalWordMethod", "After");

      await ctx.sync();

   }

   MinimalWordmethod();

})();

If you look however at the boilerplate code that is generated with a clean Yeoman project you find that RequestContext is never used, but instead of this you see Word.run(async (context) => { … });

Why is this and what is the difference? Well, I looked into this and found the answer on a piece of documentation from Michael Zlatkovsky, member of the Office Extensibility Platform team, here:

http://buildingofficeaddins.com/run

Michael explains it in his documentation but is written for Excel, however as you can read on the same page it is fully compliant with Word.run.

Here is a quote from the page:

You can think of the Excel.run as a boiler-plate preamble; it is the batch function that is the star of the show, but it needs a request context in order to start off the chain of OM calls. The Excel.run call is simply a means to that end, as it creates a new request context that it passes into the batch function.

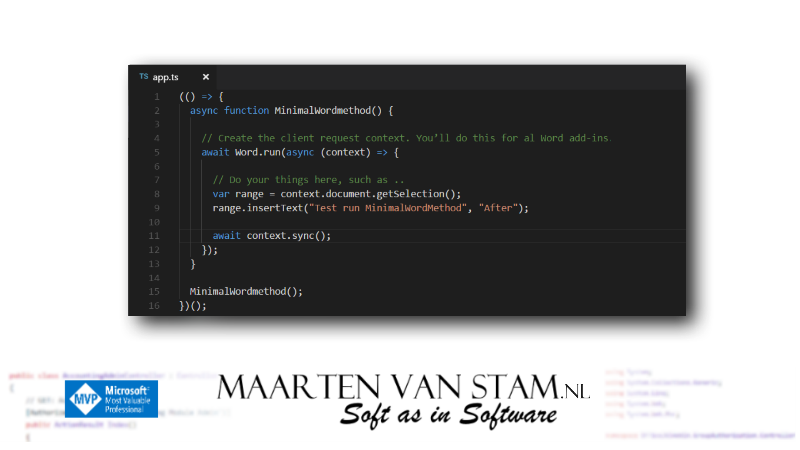
Reading this quote explains that by using the <host>.run function you start a batch process, without the trouble of creating your context by yourself. The run function will take care of this for you. So instead of the code where you create your own context object as seen in the snippet above you should be able to run the following code:

(() => {
   async function MinimalWordmethod() {

         // Create the client request context. You’ll do this for al Word add-ins.
         await Word.run(async (context) => {

         // Do your things here, such as ..
         var range = context.document.getSelection();

         range.insertText("Test run MinimalWordMethod", "After");

         await context.sync();
      });
   }
   MinimalWordmethod();
})();

How to get the new minimal code running

Go back to the Yeoman project from yesterdays post, open the project folder and open the file app.ts in the src source folder.

Replace all the code from this file as seen in the top snippet with the code from the second, new snippet above. Save it and start your Add-in ‘server’ by running npm start in the root of your project.

Opening Word, with the installed Add-in will still show you the Add-in button:

addin7_thumb

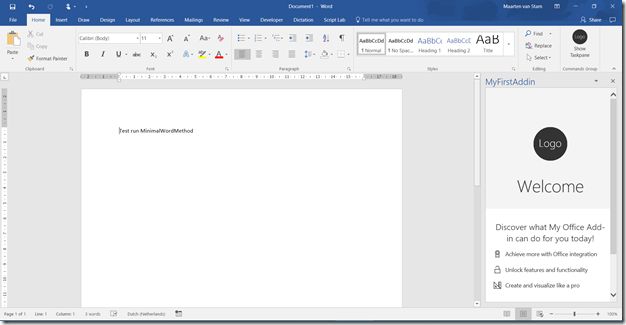
By clicking the button the Taskpane is showing, just like we’ve seen before, but now you should see the words “Test run MinimalWordMethod” in your document:

MinimalCode3

Without creating your own context the Word.run function created its own context and the code still works. As you can see this helps you to take some effort out of your hand.

To be continued …

Office Development – Word Add-in, minimal code

So far it has been fairly complex, installing lots of components and doing all sorts of things before you get things to work. But what do you need for code to do just the minimal thing in a Word Add-in?

Initially it is said that a context is required by requesting a new context:

var ctx = new Word.RequestContext();

With this context you can do things the things you’d like to do.

function MinimalWordmethod() {
  
// Create the client request context. You’ll do this for al Word add-ins.

   var ctx = new Word.RequestContext();

   // Do your things here, such as ..
   var range = ctx.document.getSelection();

   ctx.executeAsync()
     
.then(function () {})
     
.catch(function(error){
        
console.log("ERROR: " + JSON.stringify(error));
     
});
}

Interesting part is that this RequestContext is not to be found in the Yeoman boilerplate, so it looks like it is initialized by the framework these days …

I want to find out where this happened in the Yeoman boilerplate. As far as I can tell the documentation is not all too clear about this.

To be continued too Winking smile

Office Development – Coding in Script Lab

clip_image002

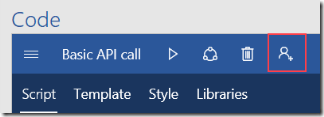
One of the nice things in Script Lab is that you can connect it to GitHub allowing you to share your code snippets or import code snippets from other people. If you opened the Script Lab Task Pane you will notice this little person icon with an even smaller plus sign.

clip_image004

With this button you can authorize Script Lab to access your GitHub account where it needs read and write access to read or write Gists. According to GitHub:

Gists are a great way to share your work. You can share single files, parts of files, or full applications. You can access gists at https://gist.github.com.

A great option to either store your scripts that you created by Script Lab for your own use but even better: to share the code with others. Get feedback, or simply make someone happy by providing the code to the community!

Clicking the button will ask you for your permission on your GitHub account. The permissions are not all that shocking, you just give permission to create, edit and get Gists from your account to be able to show it in Script Lab.

clip_image006

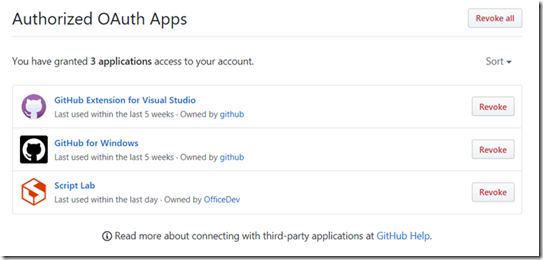
After providing your authorization you can go into your GitHub account and see the permission you just granted to Script Lab:

clip_image008

From there you can also revoke the permissions if you think they shouldn’t need the access anymore. In general, it is a good idea to go in there every now and then to evaluate who can access your code and are they still in the position where they need access. Over time the number of permissions can grow while maybe you don’t use many of the services anymore. If so, time to clean up while you are at it!

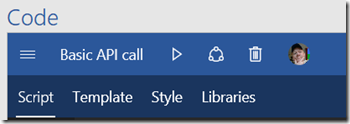
Now that you provided access to your Gists you’ll notice the little person icon changed into your profile icon:

clip_image010

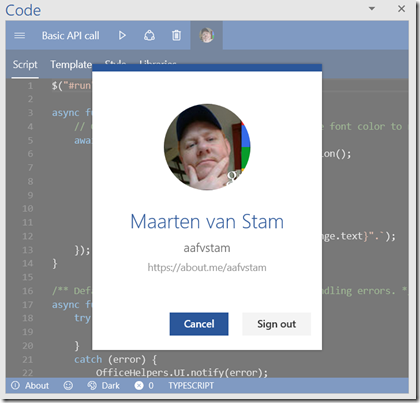
Clicking the little profile icon will allow you to see the attached GitHub account and if you like, just to sign out of your account. Cancel will bring you back into Script Lab (I probably would have titled the button “Close” instead of “Cancel”, not it gives you the impression that Cancel will disconnect the GitHub account from Script Lab, but it doesn’t).

clip_image012

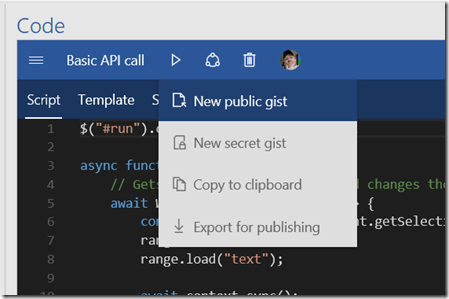
Now, your GitHub account is connected to Script Lab you can share your code snippets to Gists on GitHub. This is done through the “ Share” button. The share button has options to:

Publish a new Public Gist (for everyone to see), a new Private Gist (for your eyes only), Copy to Clipboard or to export the snippets:

clip_image014

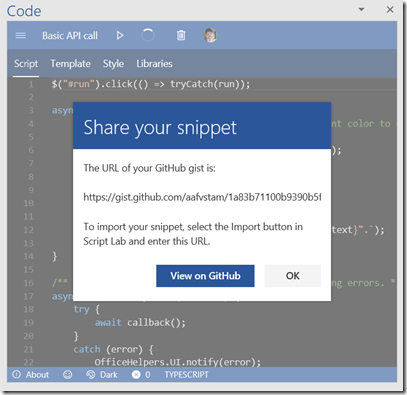
Using the option “New public gist” will push the content you created in Script Lab to GitHub. Make sure that before you do this the title property of the Script Lab project is what you want to call it. This will be adopted by GitHub as you’ll see a bit further down in this blogpost. The confirmation looks like this and will provide you the URL of the Gist that you just created. With this URL you can import the Gist at a later time.

clip_image016

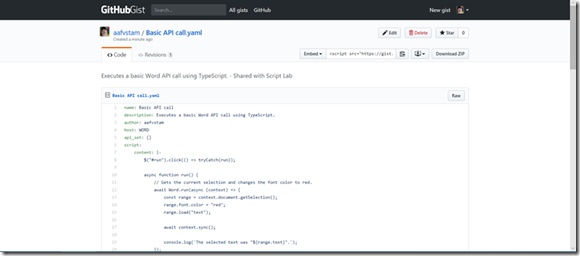
If you take the URL and open it in the browser you’ll see your code on GitHub:

clip_image018

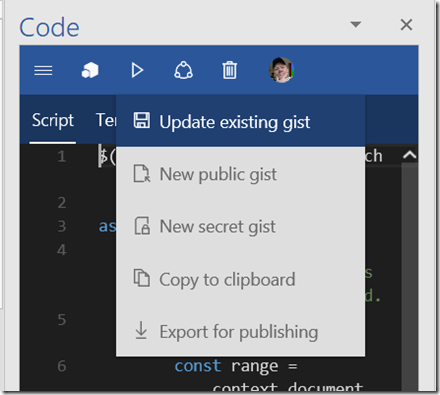
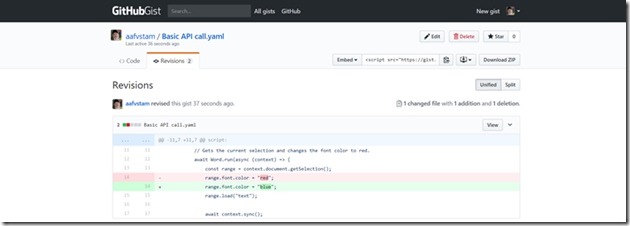
It created a new Gist, nicely formatted on GitHub and the menu changed into “Update existing gist”. If you edit your code, push the “Update existing gist” option Script Lab will go out to GitHub again and save the changes.

clip_image020

This is how it looks like on GitHub. Going into the revisions tab you can see that the line where I changed the color was updated. The line with color red was removed and replaced by the line with the color blue in it.

clip_image022

How to restore your gist?

On GitHub if you navigate to your gist you can find on the top right the URL that comes with the gist. Obviously you can also just use the URL you just used to navigate, but GitHub will provide you several other options such an embedded url to put it on your website or clone the code. Here we copy the URL:

clip_image024

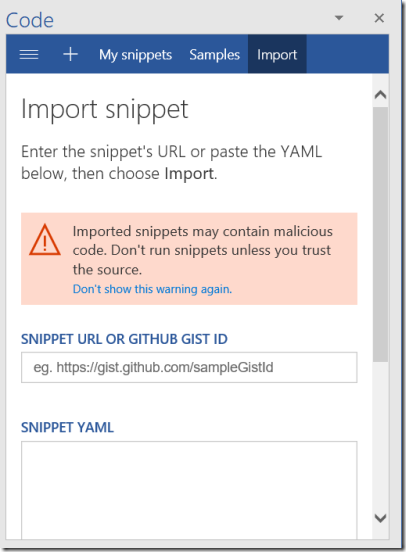
Next you go into the Script Lab menu (the ‘hamburger’ menu top left) to show you the Import option. Clicking the Import option provides you with a new dialog where you can enter the snippet URL or GitHub Gist ID:

clip_image026

Enter the URL and import the snippet. Now your Script Lab is filled with the code from the Gist, ready for you to continue your coding.

In follow-up blogposts, I will use this to test and experiment with some of the JavaScript for Office (aka OfficeJS) APIs. I really like this export option to gists. Maybe I will build a small collection of snippets for all the tested APIs for later reference.

Office Development – Microsoft Garage Script Lab

clip_image002

Up to now we researched creating and deploying a simple Office Add-in in Word Online and Word on your local machine. We still need to see how this Add-in can be deployed to a so called production environment, maybe even with a dev and staging level.

We also didn’t do much development so far. We just generated a boiler-plate project using Yeoman but we need to dive in some more and look at some real code to learn how your JavaScript for Office solutions would work.

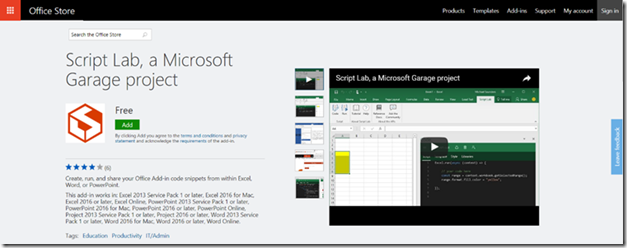
To do so Microsoft released an interesting tool as a Microsoft Garage project called Script Lab. With this tool you can code, write your test scripts and interactively test the outcome of your work. Based on the Monaco editor, yes … the one that also powers VS Code, you get a lightweight editor with in-editor-help like IntelliSense inside your Office client application. Your code snippets can use a wide variety of options such as JavaScript, TypeScript, HTML, CSS and more.

The code can run from another pane giving you options to interact with the UI, address the JavaScript for Office API and providing monitoring options such as output to a console

When you are done coding, tested it and added all the comments you now can share your snippets to GitHub right from the tool ready to share to your peer developers. With the Import function, you can do the same with code you got from shared snippets that you received from others.

Microsoft Garage Script Lab lived for a long time internally starting off a simple personal project under a different name but eventually matured by a hackathon and many other improvements to the tool you see today. The list of supported environments is huge:

The add-in works in:

Excel 2013 Service Pack 1 or later, Excel 2016 for Mac, Excel 2016 or later, Excel Online, PowerPoint 2013 Service Pack 1 or later, PowerPoint 2016 for Mac, PowerPoint 2016 or later, PowerPoint Online, Project 2013 Service Pack 1 or later, Project 2016 or later, Word 2013 Service Pack 1 or later, Word 2016 for Mac, Word 2016 or later, Word Online.

Remember that (we’ve discussed this a couple of blogposts earlier) each of the Office versions support their own subset of the APIs. When using Office 2013 your options obviously are much more limited than when using Office 2016.

How to get the tool:

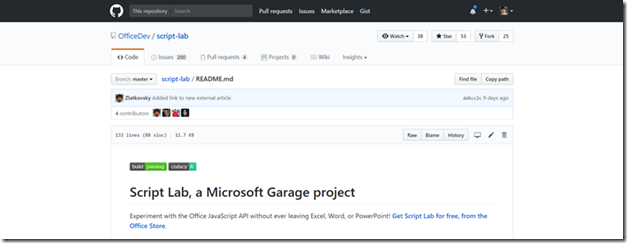
You can get the tool, or look at the code by browsing to GitHub:
https://github.com/OfficeDev/script-lab

clip_image004

Install the tool:
https://aka.ms/getscriptlab

clip_image006

Demo video:

[youtube https://www.youtube.com/watch?v=yt6os8zPUKc]

In follow-up blog posts, I’ll show how to install the Add-in and hopefully try to use and build some sample code to experiment with the JavaScript APIs for Office.

To be continued …

Office Development – Fixing Trusted Authority – Word Client

Office Development - Running Add-in Word Client

Yesterday we’ve seen an issue installing a Word Add-in when the certificate used in the Add-in is not (yet) trusted:

clip_image002

To solve this, we need to add the server certificate as a trusted authority to the certificate store. In my post Office Development – Fixing Certificate Issue with OpenSSL Certificate I already showed you how to create the certificate. I even announced that I had to add the certificate to the trusted root certificates but, in the end, never did that – resulting in the issue above.

Clean up the installed Add-in

First, let’s clean up the installed Add-in to re-do the installation later on to see if it installs correctly after adding the certificate to the trusted root certificates.

Go back to the File/Options/Trust Center/Trust Center Settings … button and click it

clip_image004

Select the Trusted Catalog Address, click Remove and click OK to close the dialog. You’ll get a message that it will be effective when you close and open Word again.

Close Word to get it done.

Now start the certificate manager:
C:\Windows\System32\certmgr.msc

clip_image006

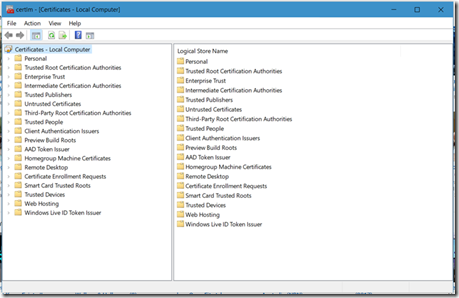
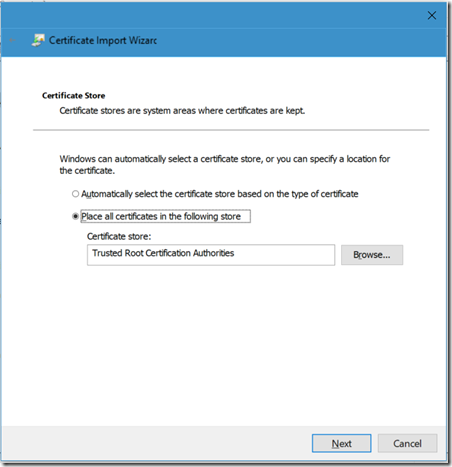
Select the Trusted Root Certification Authorities node, right click, All Tasks, Import …

clip_image008

clip_image010

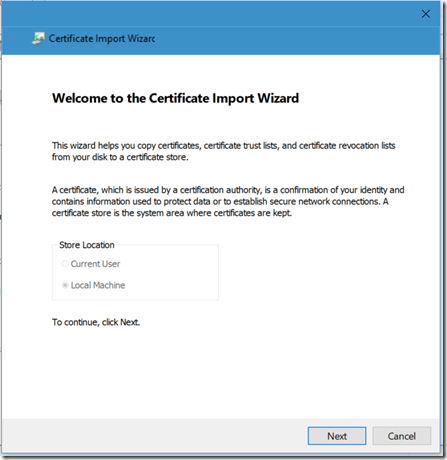
Click Next to continue

clip_image012

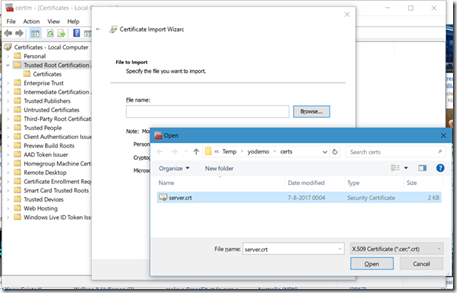
Select the server certificate from the Add-in folder that you created while generating the certificate. Click Open and add the certificate.

clip_image014

Click Next

clip_image016

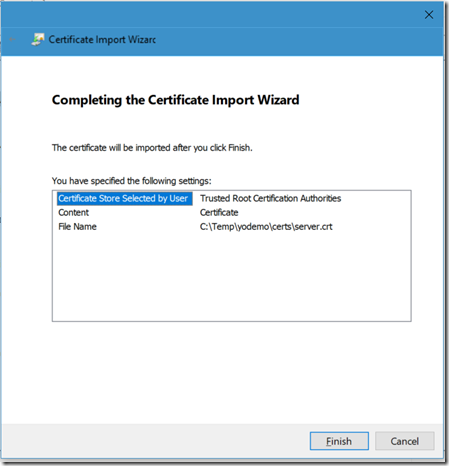
And … Finish to complete the certificate installation.

Install the Word Add-in again

Repeating the steps from the previous post, go to File/Options/Trust Center/Trust Center Settings … button and click it.

clip_image018

Add the network share again, don’t forget to check the checkbox. Close the dialogs and if you get this message below, close Word and start it again.

clip_image020

Now go to the Insert Tab and click My Add-ins.

clip_image022

Repeating the sequence that we did in our previous post, go to the Insert tab and click My Add-ins.

clip_image024

From the SHARED FOLDER tab select your Add-in again and click Add. Immediately you see the button at the Home Tab in the Commands Group.

clip_image026

And if you now click the button, the Add-in is now loaded without issues. No more warnings for security issues or incorrectly named certificates. It just runs.

clip_image028

So, what have we learned today

– Make sure your security is in place. Prepare your certificates with the correct names on the certificate and add it to the trusted root certificates.

(Note: most of these issues are originated by creating self signed certificates. When using commercially generated certificates most of these certificates already come from trusted root certificates)

– Cleaning (removing) installed Add-ins is not so trivial as you might expect. We had to remove the Catalog entry, closing Office and reopen Office clears the Add-in. It would be easier if the user interface provided an option to remove the Add-in in an easier manner.

(Note: removing the Add-in from Word Online is even worse. I asked the question on StackOverflow where it was confirmed that there is no easy remove option)

Recap

So far, we installed NodeJS, Git, Yeoman and created a simple Add-in. Next, we tried to install it on Word Online, fixed some security issues, installed it on the Word local client, fixed some more security issues and finally installed it on the local Word client again, this time without issues.

Not much interaction yet between the Add-in and Word but we’ll look at that later.

To be continued …

Office Development–Running Word Add-in on your local Word client

clip_image002

In my last post Office Development – Running Word Online Add-in I explained how to install your Add-in to use in Word Online. Today we will bring the same Add-in into your local Word client installation, Word 2016:

clip_image004

To do so you first need to start your ‘web server’ again by calling

npm start

from the root of your Add-in folder.

Now you have your ‘web server’ up and running and we need to make this visible for Word. Word is able to ‘see’ Add-ins that are exposed by manifest files in a shared network location or web URL. Today we will use the shared network location to expose the manifest file.

To create a shared network location, you simply create a dedicated folder on your machine:

clip_image006

In this case I just created an extra folder in the Add-in project called addinshare.

Don’t forget to copy the manifest file “my-first-addin-manifest.xml” to the just created folder!

Now create the network share by opening the Explorer. Go to “This PC” and select from the menu/ribbon “Manage”

clip_image008

This will open the Computer Management tool. Browse in the left tree to Computer Management\System Tools\Shared Folders\Shares, select it:

clip_image010

Select Action, New Share:

clip_image012

Go to the folder that you dedicated for your Add-in

clip_image014

clip_image016

Click Next to continue

clip_image018

If you like change the name of the share, and click Next

clip_image020

For now, add All Users have read-only access (you might want to change the access rights later on but for demo purposes pick the default) and click Finish.

clip_image022

Click Finish again to close the dialog and close the Management Tool.

Now back to Word, goto the Trust Center under File, Options, Tab Trust Center, Button “Trust Center Settings …”

clip_image024

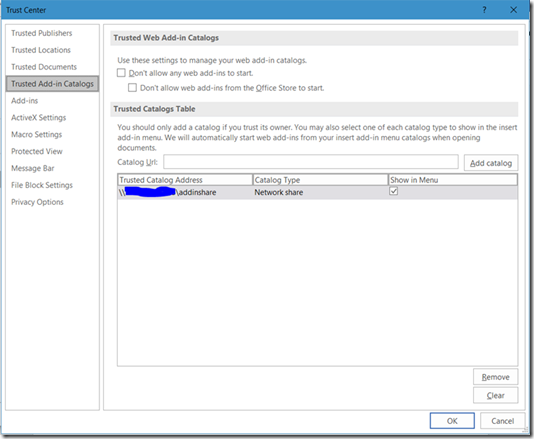
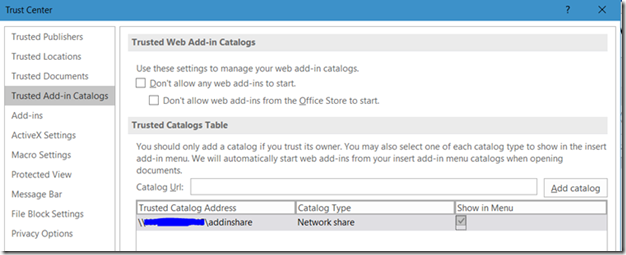
On the left side select “Trusted Add-in Catalog” and in the Catalog URL enter the network share from your computer \\<computername>\<sharename> that you just created in the previous steps. Click Add catalog to push it in the list.

When added to the list, check the checkbox Show in Menu to make it available in Word.

Note: Before clicking “Add catalog” it would be a good thing to check in Explorer that your folder spelling of the shared folder is correct and is opened without issues.

clip_image026

Click OK twice to close the dialogs. You may see this as well:

clip_image028

If all went right you should be able to add your Add-in to Word. Close all instances of Word and restart Word.

Go to the Insert Tab, just like you did in Word Online from the previous post and click My Add-ins:

clip_image030

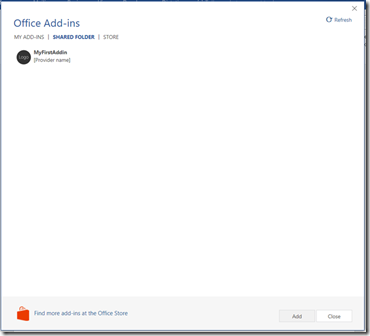
Clicking the My Add-ins button in the ribbon will give you the dialog below if you select the option SHARED FOLDER (notice that Word recognized the share and provided you with this menu option. If the share wasn’t recognized the option for SHARED FOLDER would not appear).

clip_image032

What is up? Didn’t we fix the certificate issue? We had it running in the browser, didn’t we?

Well, yes … but what I forgot was to add the certificate to the list of trusted authorities. For now we can go on, we know it is safe but we need to fix this later on (food for another blogpost ).

Click Yes to confirm, select the MyFirstAddin an click Add.

clip_image034

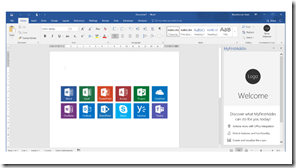
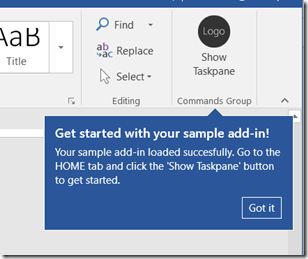
After closing the dialog by clicking Add a new Ribbon item is added to your Word Home Tab:

clip_image036

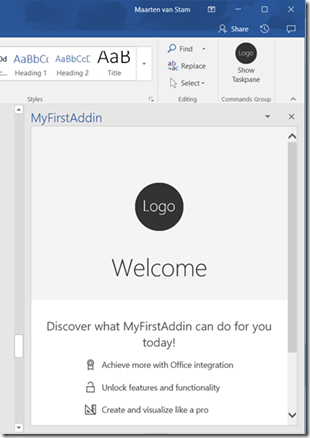
Kinda useless information, you are already on the HOME tab … nevertheless, click the “Show Taskpane” button to get started. For me this resulted in:

clip_image038

Sh*t happens so I refreshed the page, to see what happened:

clip_image040

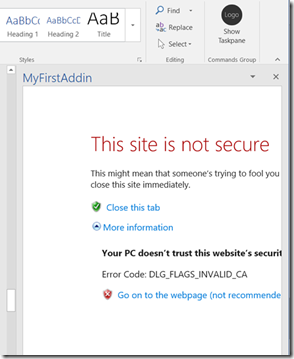
A bit better, but still not right. This time we recognized the “not secure” warning. My own fault, it still needs the trusted authority fix. For now, click More information:

clip_image042

This opens up the option to Go on to the webpage (not recommended). We know it is ok in this case, if the source was unknown you should just back out and close the add-in. In this case we created it, know it is secure so we go on to the website, although it was not recommended. We like to be a little bit stubborn at times and there you have it, it worked:

clip_image044

Quite a journey again, still not flawless but cause by my own doing. We now have the Add-in running in both Word Online and in Word 2016 on your local machine.

In our next step, I’ll add the certificate to the trusted authorities to redo this without issues, hopefully…

To be continued